Converting QuickBooks Desktop to QuickBooks Online
product update

How to convert QuickBooks Desktop to QuickBooks Online Advanced

Congratulations for choosing to modernize and move your client to QuickBooks® Online Advanced. Conversion for some clients may be easier than others. This article is designed to diagnose a client’s eligibility for conversion and then to walk you through the process, step by step, with easy-to-follow checklists.


My objective here is to concentrate on the basic parameters to consider when converting. Understanding the “why” things do or don’t convert is key to understanding what the possibilities and limitations are.


Assessing the client and files

There are several processes that should be considered before recommending and converting to QuickBooks Online Advanced, but let’s begin with looking at your conversion tool limitations. If you’re new to converting files from QuickBooks Desktop to an online version of QuickBooks, there is a conversion tool located in QuickBooks Desktop that will transfer nearly all of the desktop database to QuickBooks Online Advanced. However, be aware that some of the information will not be imported during the conversion. Some of these limitations include:


  • Reconciliation history and reports.
  • Recurring credit card charges.
  • Memorized reports.
  • Audit trail.

Here is a link to a comprehensive outline of what to expect from the conversion tool.


As far as the conversion tool itself, most of the time the process goes pretty smoothly, but before doing this step, we need to do our homework. You may have heard a painting contractor say, “Most of the work is prep, not the paint.” Well, the same applies for us here. We must assess the client, know what will happen in the conversion process, then clean the data if necessary, and move forward.


You will need to dig into your client’s desktop file and look at the following areas.


Inventory


Inventory costing method: You should be aware that the default costing method for inventory in QuickBooks Desktop is average cost; QuickBooks Online’s costing method is FIFO. Here’s why this should be considered before converting any clients currently tracking inventory in desktop:


  • The conversion tool will capture the weighted average of existing inventory items in desktop at the moment of conversion.
  • Once in QuickBooks Online, the average value will be divided by the quantity to determine the value of the first FIFO layer of that item.

You will need to decide whether to use QuickBooks Online inventory; you’ll be presented with that inventory decision by the conversion tool.


  • Some clients may need to continue the use of average costing.
  • If so, you might consider NOT turning on Inventory in QuickBooks Online and use a third-party app instead.

Database analysis


Older files with years of history need some consideration, especially if the client wants to convert ALL of the data. It is our responsibility to not only look at current balances, but also dig into the history of how QuickBooks Desktop was used. Check the following:


Negative inventory balances: If an inventory value is negative, the FIFO costing method in QuickBooks Online has no basis. QuickBooks Online will automatically value unpurchased items that have been sold. On the Inventory/Cost of Goods Sold (COGS) transaction, QuickBooks Online will assume that the average cost of the items NOT on hand is either the same average cost as the items you had on hand OR the ‘Item Cost’ from the Item List.


Here, QuickBooks Online Advanced is making its own intelligent decision, but to avoid this, it is a best practice to verify inventory balances and make sure that they are accurate. It is necessary to clean up and adjust inventory before converting to QuickBooks Online.


Accounts receivable (AR) and accounts payable (AP): Make sure the open balances are accurate and all unapplied credits are applied before conversion. Do this by checking the aging reports for both AP and AR in the desktop file, and then applying any open debit or credit memos to their respective invoices or bills.


To find the aging reports you will need:


  • Go to Reports > Customer & Receivables and pull; AR Aging Summary
  • Go to Reports > Vendors & Payables and pull; AP Aging Summary

Unbilled costs: When converting a history of either unbilled expenses, unbilled time or unbilled items, QuickBooks Online will block the ability to make the connected COA account inactive.


If there is a history of unbilled costs, unchecking the “billable” box one at a time on each transaction can be time consuming, but here’s the good news: There is a workaround in QuickBooks Desktop to clear unbilled costs in batches.


Run the “Unbilled Costs by Job” report under Reports > Customers & Receivables.


  • Create an Invoice for each Customer with unbilled costs.
  • Click the Add Time & Costs icon.
  • Select each tab (Time, Expenses, Mileage & Items) and check “Hide” on all unbilled costs you need removed.
  • Click OK.

That last step will clear the billable costs for that Customer. No need to save the invoice. Because we can only do this one Customer at a time, one invoice per Customer, we need to use the create invoice screen for each Customer with billable costs and follow the same steps.


You should review the “Unbilled Costs by Job” report in QuickBooks Desktop and address and unbilled expenses prior to conversion. At the time of publication, there is no “Mileage” feature in QuickBooks Online.


PRO-TIP: If the client is already in QuickBooks Online, you can clear unbilled expenses in bulk. Open the client’s QuickBooks Online, and in the URL remove anything after “qbo.intuit.com/app.” Then, insert this at the end of the url address: /managebillableexpense


The “Hide Unbilled Expenses” tool will load. Choose a date. The tool will clear any unbilled costs before that date in one easy step. Now, the associated account in QBO can be made inactive.


NOTE: This tool only works with Bills, Checks and Expenses with rows marked billable. You should clear unbilled Time & Items in QuickBooks Desktop using the workaround mentioned above, and do this before conversion.


Financial Reporting history: It is a good idea to run both profit & loss (P&L) and balance sheet reports with a previous year comparison for the history of the file. The reason checking reporting history is so important is that some clients may have been using the chart of accounts in interesting ways. For example, this may include inactive accounts or sub-accounts used in lieu of classes or vendor names as sub-accounts under Subcontractor Expense.


The list of “interesting” anomalies could go on and on. Doing a little homework here will be wise, but you should carefully consider if merging these accounts is an appropriate course. It could affect prior year financial reports if you do.


To check the P&L and Balance Sheet in QuickBooks Desktop, go to Reports > Company & Financial. Under this sub menu you will see:


  • Balance Sheet with Previous Year Comparison.
  • Profit & Loss with Previous Year Comparison.

Open both and then change the date range to “All” and the columns by “Year.”


This will give you a general feel of how the chart of accounts has been utilized over the years.

Class reporting history: If the client has a long history of class tracking, you will want to look at the data to see if there are classes that may have been used differently or improperly in the past. You should verify how classes have been used over the history of the desktop file. Inactive classes do not convert.


If necessary, use the “Reclassify Transactions” tool in QuickBooks Desktop to batch reclassify transactions to the correct one.


To clean up classes:


  • First check the Class list for inactive classes. Lists > Class List.
  • Check the box at the bottom left to show any hidden classes that are no longer in use.
  • Then run a report to check the history of use for each class. Reports > Company & Financial > P&L by Class. Change the date filter to “All” to view all entries posted to these accounts for the history of the file.
  • Review the class columns on the report. See if there are any redundant or unnecessary classes. Decide how each should be addressed and use the following options to clean up the classes.
  • Merge duplicates. Will reduce the number of classes that convert.
  • Make unused classes inactive. Will also reduce the number of classes that convert.
  • Condense data. This is only an option if there are some classes that were misused historically AND you only want to convert from a certain date forward. The condense tool can remove transactions and their associated “unused” class in one move.

PRO-TIP: Condensing data in QuickBooks Desktop may help. If the client does not need the entire history from a desktop edition, you can condense the data prior to conversion. This will remove transactions prior to a designated date and post an opening balance entry at that same date. When transactions are removed, the condense tool gives you the option to remove any unused list entries as well. This graphic shows which unused list entries you have the option to remove when condensing.


It is important that you review the procedures I’ve outlined above with your client. Try to determine the reasons they need, or don’t need, historical lists. Explain the conversion process and the effect on historical reporting, then suggest your solutions, if any. Once everyone decides to move forward, make a backup to keep the original detailed data intact before you start cleaning or condensing the file.

Conversion process

Now that you have cleaned up the file and made the decision to convert, let’s walk through the conversion process. The process generally falls into three phases, Pre Conversion, Conversion and Post Conversion.


Pre conversion


Start by setting up a new QuickBooks Online Advanced subscription for the converted data to upload to. You will be working from the QuickBooks Online Accountant dashboard.

Log into QuickBooks Online Accountant and look for the + symbol at the top right. This is the Quick Create menu. Make sure you are not in any of your client’s files. You must be at the “Your Practice” screen or the workflows below will not be there. Then, follow these steps.


  • Create new QBO subscription.
  • QBOA > Quick Create > Client.
  • Follow prompts.
  • Choose subscription and who will pay the subscription fees.
  • Sign out of QBOA

The new QuickBooks Online Advanced subscription should now be listed on your client dashboard in QuickBooks Online Accountant. Click the QuickBooks logo next to your client’s company name to open the file. There won’t be any data in this new subscription, but it is ready for our next steps. You will have 180 days to import desktop data to this new QuickBooks Online Advanced subscription before it locks.


First, make sure you are logged out of the QuickBooks Online Accountant file. This will help when you are prompted to log into QuickBooks Online Accountant again.


Next, verify if the client’s desktop file is compatible with the conversion tool. In QuickBooks Desktop, open the company and follow the steps below. These steps will verify the desktop database and prompt you to take additional action, if necessary. It will also rebuild the data as a cleanup step. Do not skip this process! You want to make sure well-structured data is moved over to QuickBooks Online Advanced.


NOTE: If the desktop software is more than two years old, you should download a free 30 day trial of the latest edition, install and open the company file in that latest desktop edition.


  • Confirm QuickBooks Desktop file will convert:
  • Open desktop file and run some utilities.
  • File > Utilities > Verify Data.
  • File > Utilities > Rebuild Data.
  • Tap [F2].
  • verify number of targets is below 350,000
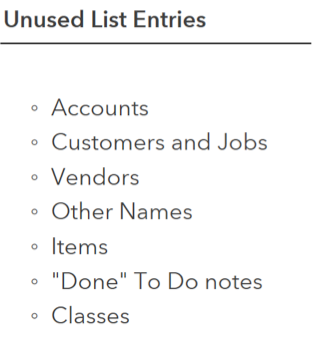
  • verify lists totals are below usage limits
  • If necessary you can:
  • Merge or make inactive any unnecessary list items.
  • Condense data to remove targets and list items.
  • Create a backup for a pre-conversion archive.

Conversion

You should already be in QuickBooks Desktop and have verified that the file is cleaned up and ready to move over to QuickBooks Online. QBO. You also have two complete backups filed away, one that you made before you started cleaning up the Desktop file and one that you made after the cleanup, but before conversion.


The conversion tool is located in the Company Menu in QuickBooks Pro and Premier.


If you are using QuickBooks Enterprise, the steps are a little different.


  1. Open the QuickBooks Enterprise company file.
  2. On your keyboard, press Ctrl+1 to open the “Product Information” window.
  3. Press Ctrl+B+Q.
  4. Select OK to close the Product Information.
  5. Follow the prompts to connect to QuickBooks Online.

Note: If the sign-in window doesn’t appear after closing “Product Information”, repeat steps 1-4.


If your client is using Mac, click this link to review additional resources on converting from Mac.


  • Open QuickBooks Desktop
  • Company > Export Company File to QuickBooks Online
  • Click Continue to start the interview
  • Enter your QBOA login info and agree to the Terms of Service by clicking Sign In.
  • Review your moving-day checklist and access linked resources. Click Continue.
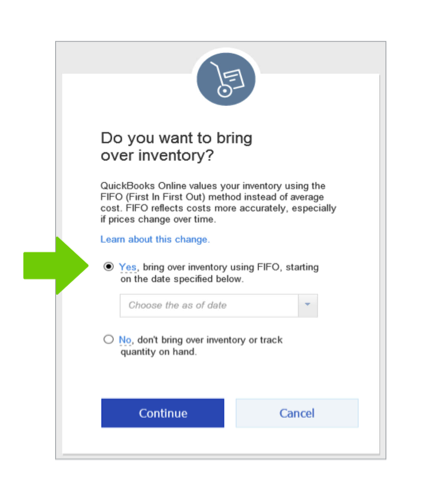
  • Designate if you want the Inventory feature enabled in QuickBooks Online Advanced and desktop inventory converted to FIFO. Click Continue.
  • Choose your client’s QuickBooks Online Advanced subscription from your firm’s client list then Continue.
  • Type AGREE to allow acknowledge this step will be overwriting any data currently entered in that subscription. Click Replace.
  • Intuit® will email you when conversion is finished.

The conversion is now complete. As you can now see, most of the harder work was done prior to the conversion phase. Intuit has made the actual conversion part easy. The key is to be sure you do your homework before you convert; this will make it all go smoother overall.


Post conversion

You will now receive an email from Intuit letting you know the data has been converted and you can access an Import Summary report to get more insights on the conversion. Save it for your records.


NOTE: If for any reason the file did not convert, Intuit will send you a notification. In my experience, they are really helpful at this stage so don’t worry. Just contact QBOA support for next steps.


Now, log back into QBOA and click the QuickBooks logo next to your client’s company name to open the QBO file that now contains the imported desktop data. You will need to have the QuickBooks desktop file open as well. Follow these steps below.


  • Compare Reports: For each of the following, open in QuickBooks Online and QuickBooks Desktop and check for differences. NOTE: The first three reports in the list below will not match if you are importing inventory – this is due to recalculations from average cost inventory to FIFO.
  • Run Balance Sheet, all dates, accrual basis.
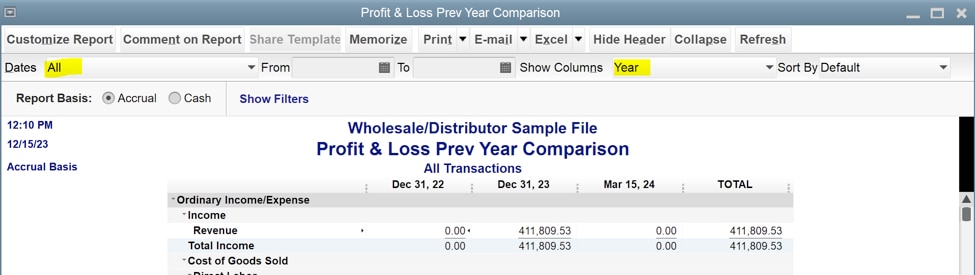
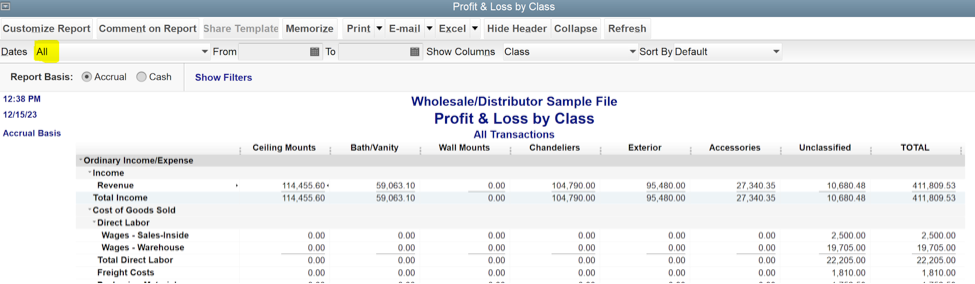
  • Run Profit & Loss, all dates, accrual basis.
  • Inventory valuation summary, all dates (if applicable).
  • Open Invoices.
  • Unpaid Bills.
  • Undeposited Funds transaction detail report.
  • Sales Tax Liability.
  • Payroll Tax Liability.
  • Last Reconciliation report.
  • Open in QuickBooks Desktop
  • Use to create initial reconciliation in QBO
  • Sales Tax Payments
  • Taxes > Sales Tax > Record Tax Payment.
  • Pre reconciliation, reissue and replace converted sales tax payments.
  • Payroll setup
  • Employees on left navigation bar.
  • Verify “Paid In.” All employees paid in current year are marked YES.
  • Click Complete payroll setup.
  • Continue through prompts to complete setup.
  • Check inventory conversion (if applicable)
  • Converted to FIFO.
  • Conversion tool will send error notifications (if any). NOTE: Complete and file IRS 3115 if client’s costing method will change (ie: average cost to FIFO)
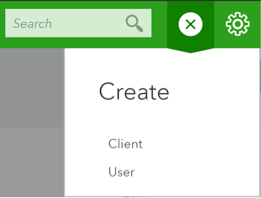
  • Set up Users and permissions
  • Gear > Your Company > Manage Users.
  • Company Information
  • Gear > Your Company > Account and Settings > Company.
  • Reconcile accounts
  • Gear > Tools > Reconcile
  • Perform initial reconciliation in QuickBooks Online based on final reconciliation in QuickBooks Desktop
  • Add attachments
  • Customer list.
  • Vendor list.
  • Individual transactions.
  • Attachment center located in Gear > Lists > Attachment.
  • Lists
  • Make unwanted list items Inactive.
  • Merge duplicate list items.
  • Customize Sales Templates
  • Gear > Your Company > Account and Settings > Sales.
  • Recreate Memorized Reports
  • Reports > My Custom Reports.
  • Connect Apps
  • QBOA > Apps > Find Apps. NOTE: Check with developer(s) to ensure new connection will not duplicate activity.
  • Connect QB Payments
  • Gear > Your Company > Account and Settings > Payments.
  • Connect Bank Feeds
  • Banking > Add Account. NOTE: To avoid duplication, choose appropriate date range for initial download.
  • Set Closing Date
  • Gear > Your Company > Account and Settings > Advanced.

Congratulations! You have successfully moved your client to QuickBooks Online Advanced. You can now collaborate and work with your client in real time. No more boxes of receipts, exchanging Accountant’s Copies or needing thumb drives. There are so many benefits to transitioning your clients to the cloud. Enjoy the new freedom that cloud accounting gives you and your clients!


Get the latest to your inbox

Get the latest product updates and certification news to help you grow your practice.

By clicking “Submit,” you agree to permit Intuit to contact you regarding QuickBooks and have read and acknowledge our Privacy Statement.

Thanks for subscribing.

Relevant resources to help start, run, and grow your business.

Looking for something else?

Get QuickBooks

Smart features made for your business. We've got you covered.

Tax Pro Center

Expert advice and resources for today’s accounting professionals.

QuickBooks Support

Get help with QuickBooks. Find articles, video tutorials, and more.

How can we help?
Talk to sales 1-800-497-1712

Monday - Friday, 5 AM to 6 PM PT

Get product support