A tax professional going over tax reform with a client.
accounting

QuickBooks can do WHAT? Prep for Taxes

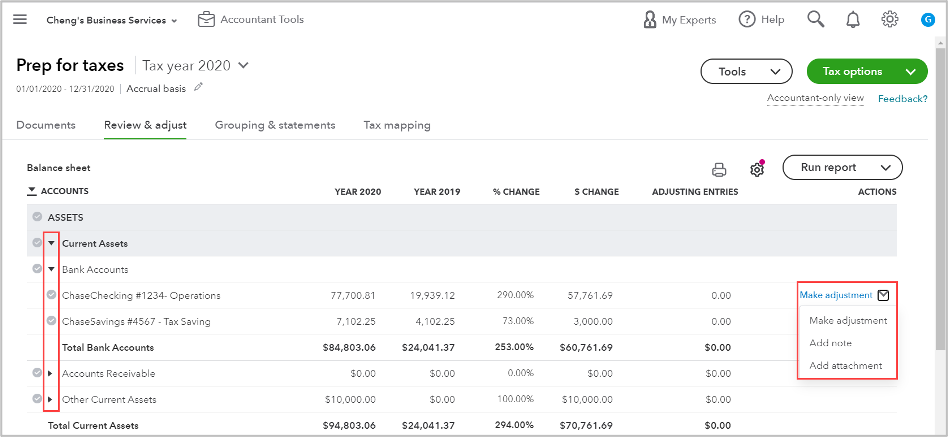
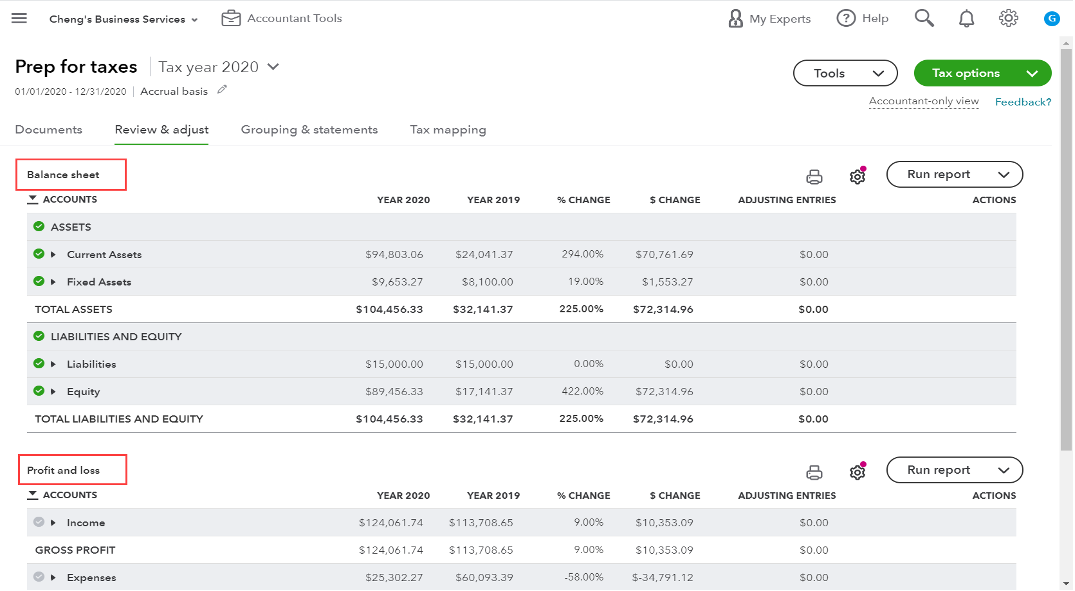
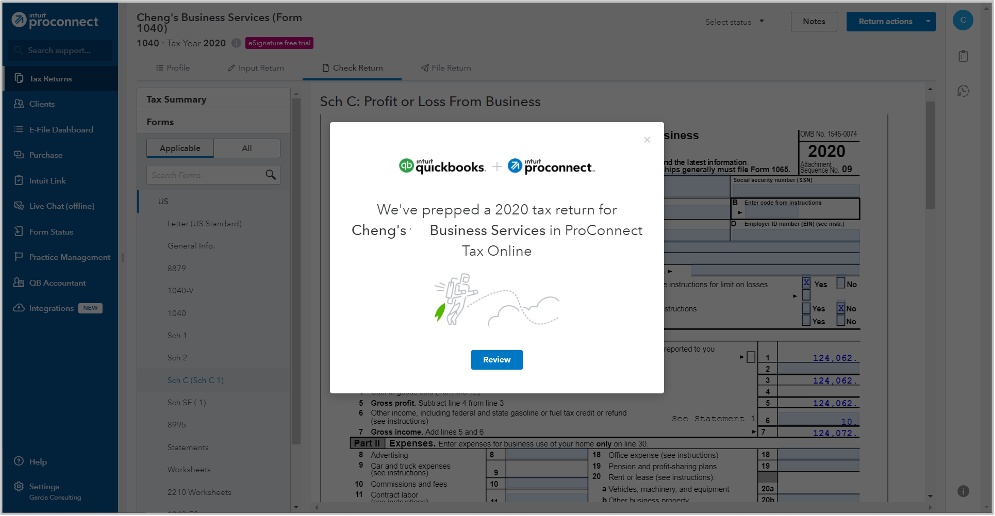
Books-to-tax adjustments can be a time-consuming challenge for any accounting pro during tax season. Prep for Taxes simplifies your review process because it provides a single area where you can review and adjust your clients’ profit and loss statement (P&L) and balance sheet balances, compile and store workpapers, and create exportable financial statements, all in one place. Plus, when you’re done, you can export returns directly to Intuit® ProConnect™ Tax to save even more time.


What can it do?

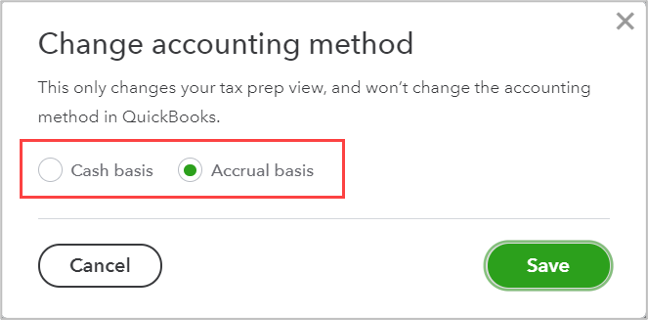
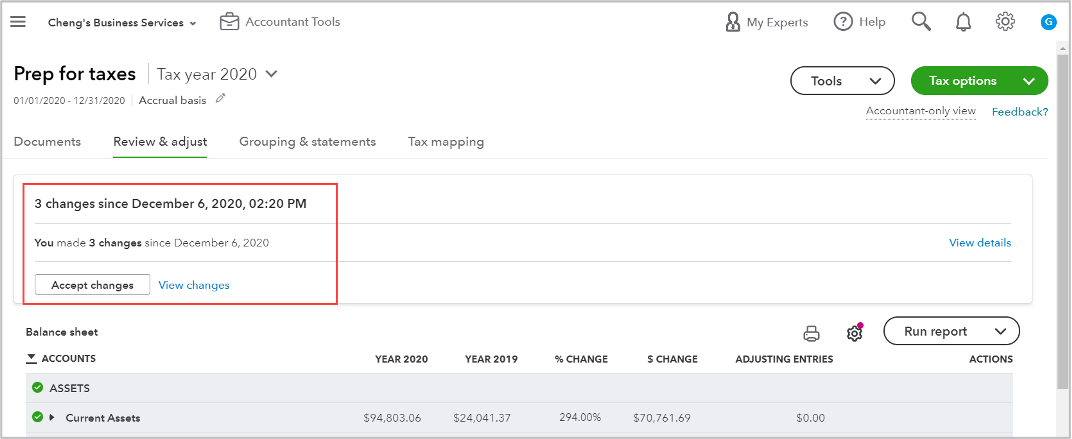
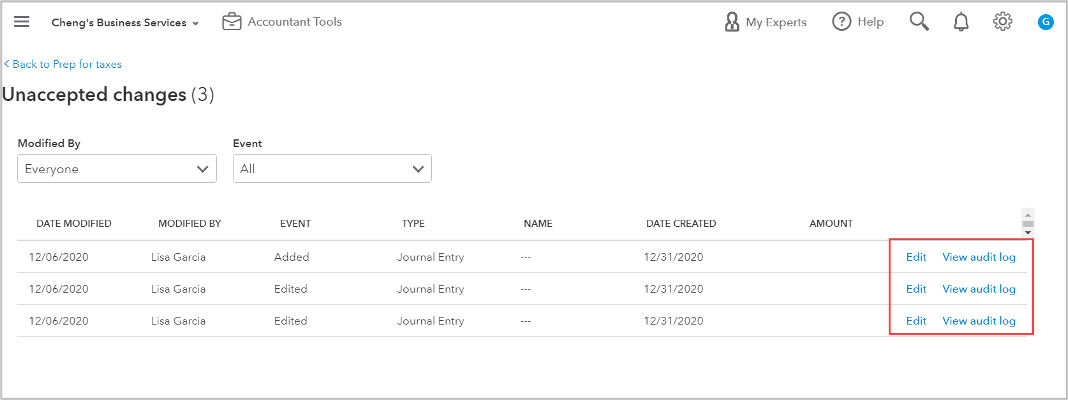
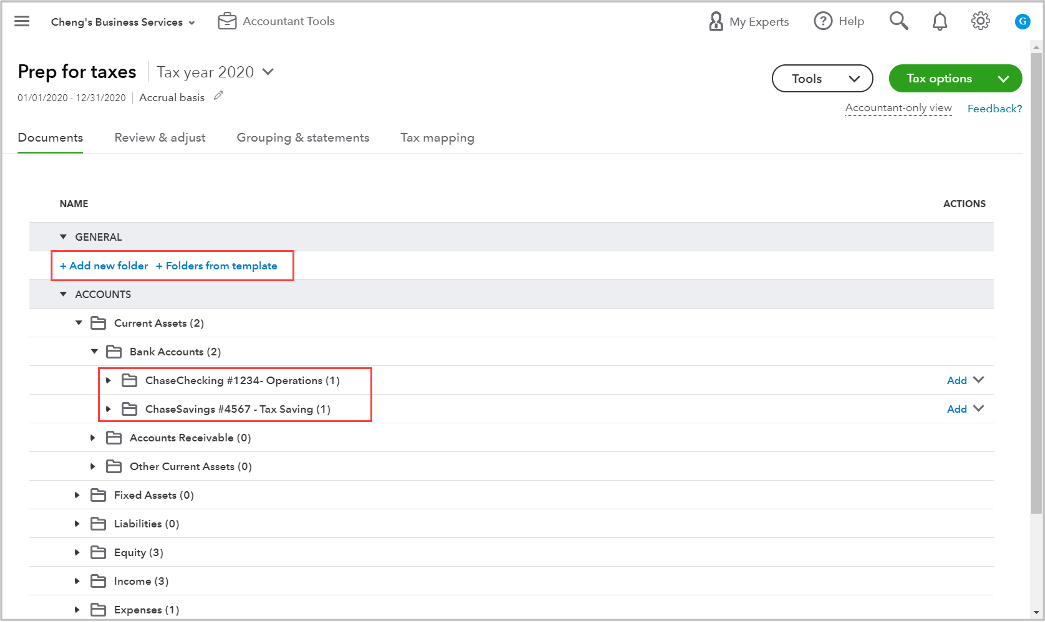
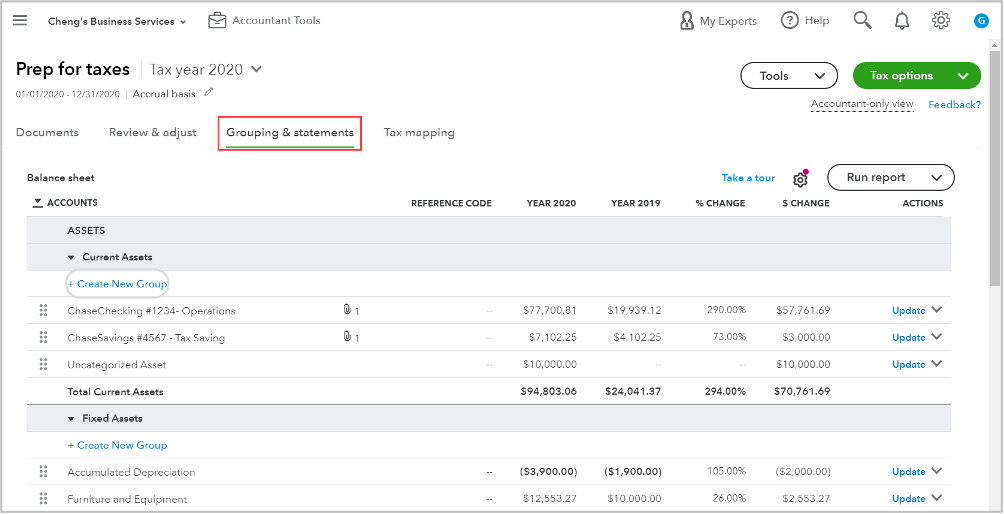
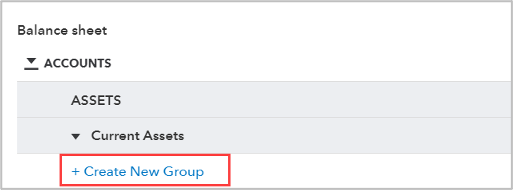
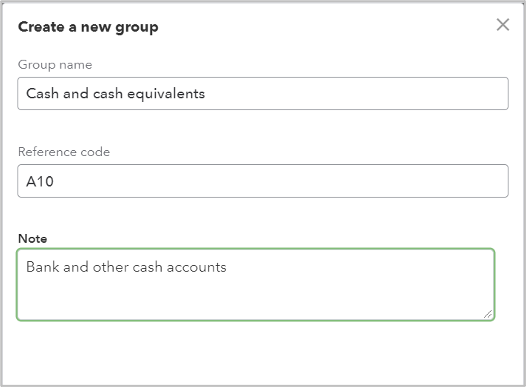
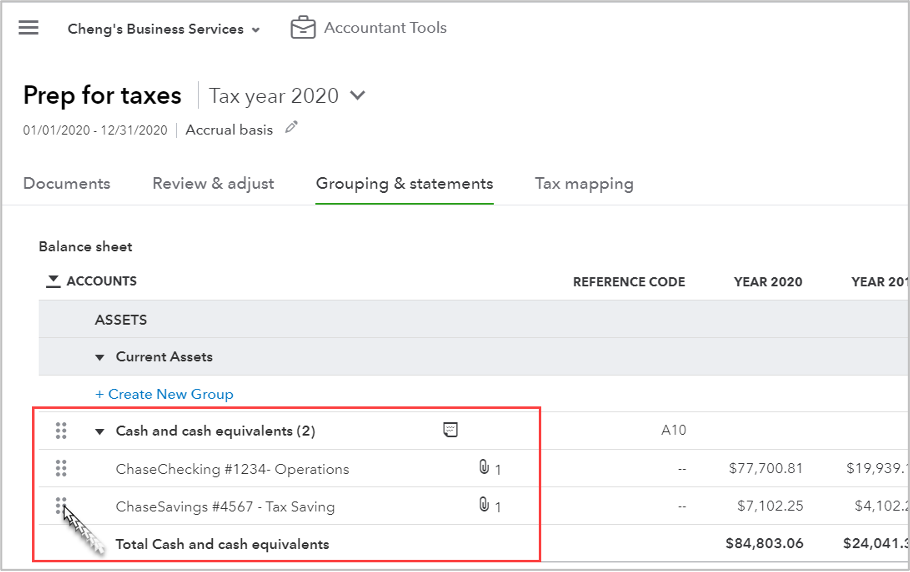
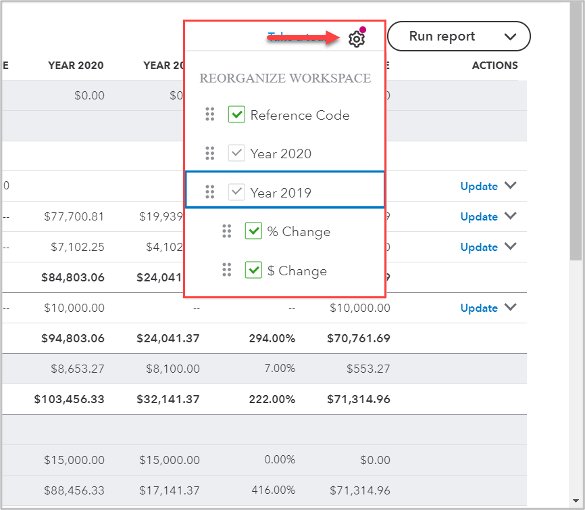
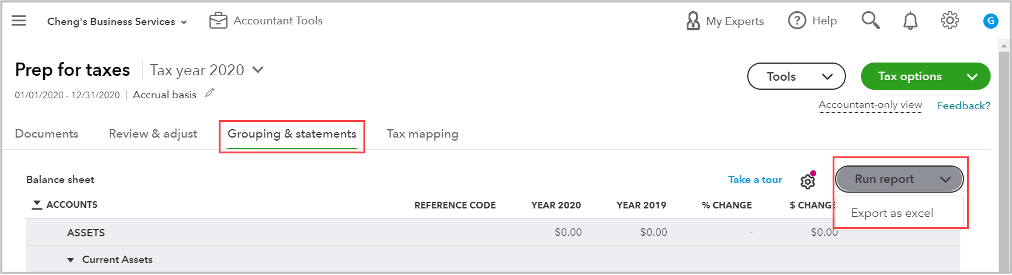
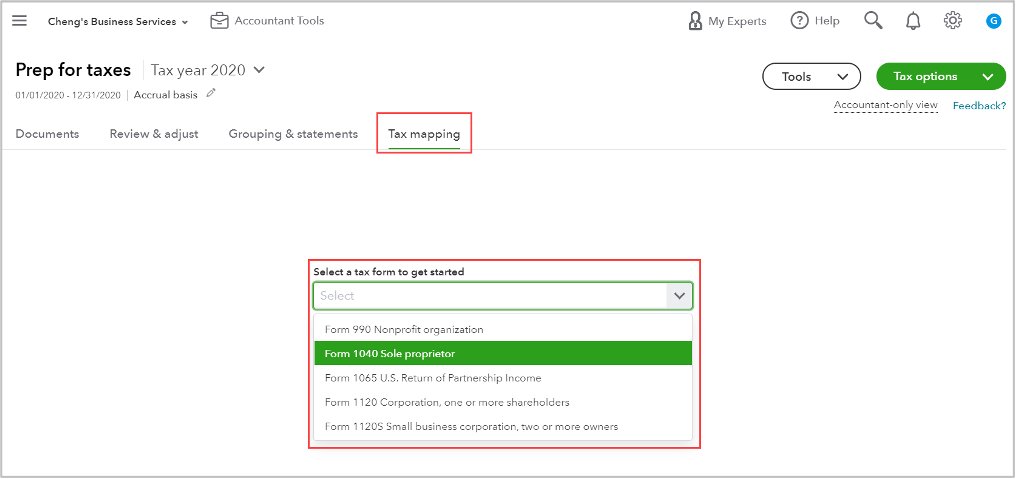
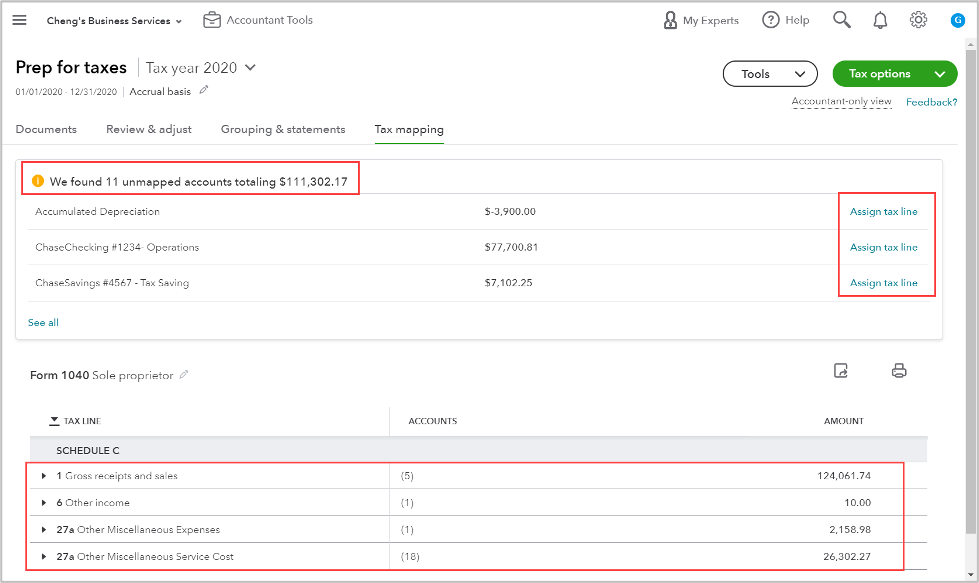
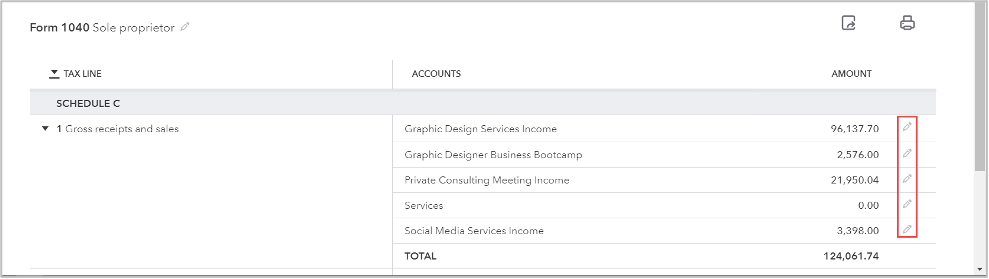
Prep for Taxes helps you easily calculate taxable amounts without changing the reporting basis settings of the QuickBooks® Online company. This dashboard and depository lets everyone on your team view and approve adjustments, attach and store workpapers, and leave notes about important tax-related matters. It also syncs your adjusted tax line amounts to ProConnect Tax, saving you and your team countless hours of manual data entry. Even more, the Grouping and Statements dashboard gives you the flexibility to customize account groupings to meet the individual needs of all your clients.


Where do I find it?

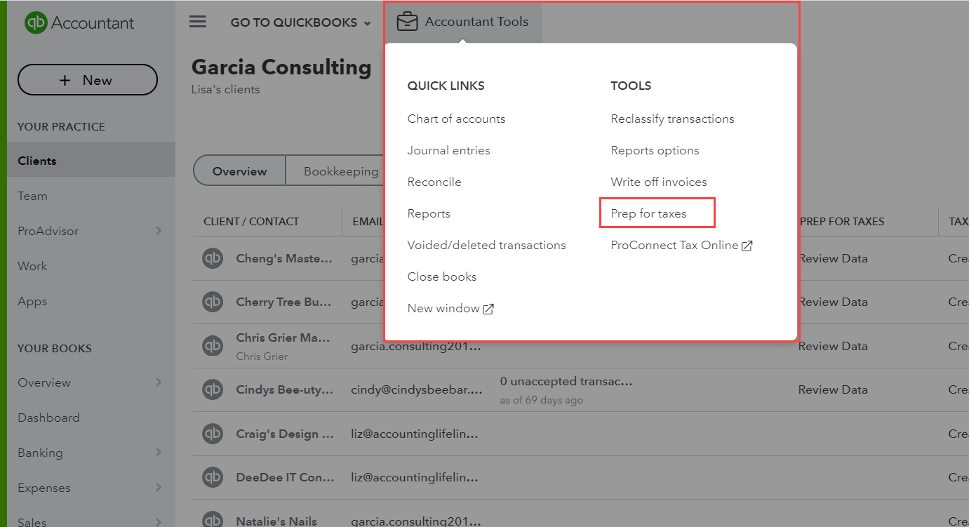
You can find Prep for Taxes right inside your QuickBooks Online Accountant client dashboard or from the accountant toolbox at the top when you are in your client’s books.

How do I use it?

To begin, just select the tax year and basis for the period you want to review.


To make your review easier, you can switch accounting methods between cash basis and accrual basis without affecting your client’s accounting method settings, or view in QuickBooks Online. To switch, click on the pencil icon at the top, then select the method you want.


Start the process on the Review & adjust tab. Accounts are organized by Balance Sheet and Profit and Loss on one convenient screen. Click on the caret icons to expand and view the balances for each account in QuickBooks. As you review each account, you can easily make adjustments, add notes, and add attachments that can be viewed by all team members who have been given access to the client in your QuickBooks Online Accountant account. This way you, can work quickly and efficiently.

As you work through the list of accounts, you can click the caret icon to collapse each section and mark it complete when you’re done with your review.


Prep for Taxes records all your changes and sets them aside for a final review and approval before it adds them to the adjusted amount.


Click to view the changes, and when ready, click Accept changes to incorporate them into the final tax balances.

You can even export the workspace to an Excel workbook or print it out to keep in your client’s work paper records.


You can view all the attachments that have been assigned to accounts in the Documents tab. This makes reviewing your team’s work a snap because everything is in one place and organized. A folder is automatically added to Prep for taxes for each account and you can create new folders individual or by using a template from another client.


After you’ve ticked and tied each account in QuickBooks, you’re now ready to create year-end reports and map the accounts to each line of the tax returns. Firms like yours need flexibility when creating year-end reports for their clients. The Grouping & statements tab gives you exactly that.


Arrange your accounts into different groups so when you prepare your financial statements they look exactly right. Create a group, add a reference code, notes, and attach documents as need to keep your workpapers organized and consistent.


Drag and drop accounts into different groups. QuickBooks automatically saves your progress.


Select the Gear at the top right of the report to add or remove columns or drag them into a different order.


When you’re done, select Run report to export your workspace to Excel. From there, you can make additional edits, print, and save your work.


The next step is to map the accounts to each line of the tax return.


Start by selecting Tax mapping at the top of the screen. Then select the appropriate tax form by clicking on the pencil icon.

Prep for Taxes will automatically assign the accounts in QuickBooks to each tax line, but it’s always a good idea to verify that each account has been mapped correctly. Any accounts that aren’t automatically mapped will be listed at the top of the screen.


To assign a tax line, just click Assign tax line from the unmapped accounts listed at the top or select the pencil icon next to the account you want to change.


After you complete the mapping, you can start the client tax return. If you use ProConnect Tax Online, balances can be sent to ProConnect Tax Online with a click of a button, saving you from tons of manual data entry. Here’s how:


Select the Tax options button at the top right of the Prep for taxes dashboard. You will see options to update existing return, create a new return, or export a CSV file.

You can choose to update an existing tax return already started in ProConnect Tax Online or Create a new return. If you’re using another tax prep software such as Intuit ProConnect ProSeries® Tax or Lacerte® Tax, you can export the mapped tax data to a CSV file which you may be able to import into that software.


Once the return is completed, use the Tools in Prep for taxes to:


  • Download a zip file of the Prep for taxes workspace including all attachments to your firm’s document management system.
  • Carry forward data from previous year.
  • Lock the year.

Tips and tricks

  • Prep for Taxes can be used to organize and track your client year-end close process. Use the dashboard to attach all your year-end work papers and notes so to easily find them every year 24/7, 365.
  • By just clicking on the pencil icon on the tax mapping screen to select a different type of return, you can change the type of tax form you need for your clients. The accounts in QuickBooks will be remapped to the tax lines of the new return type.
  • Prep for Taxes is only available QuickBooks Online Accountant and each accountant user with access to the QuickBooks Online account has access to their own instance of Prep for Taxes.

Get the latest to your inbox

Get the latest product updates and certification news to help you grow your practice.

By clicking “Submit,” you agree to permit Intuit to contact you regarding QuickBooks and have read and acknowledge our Privacy Statement.

Thanks for subscribing.

Relevant resources to help start, run, and grow your business.

Looking for something else?

Get QuickBooks

Smart features made for your business. We've got you covered.

Tax Pro Center

Expert advice and resources for today’s accounting professionals.

QuickBooks Support

Get help with QuickBooks. Find articles, video tutorials, and more.

How can we help?
Talk to sales 1-800-497-1712

Monday - Friday, 5 AM to 6 PM PT

Get product support