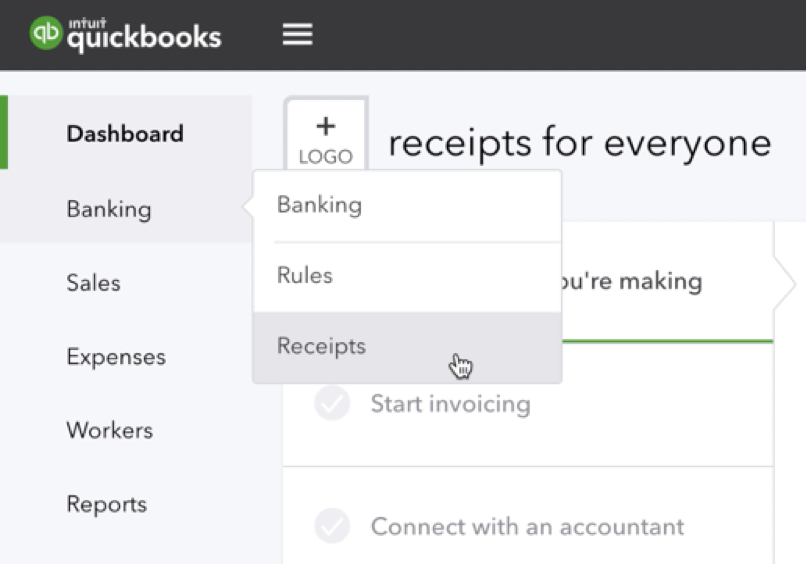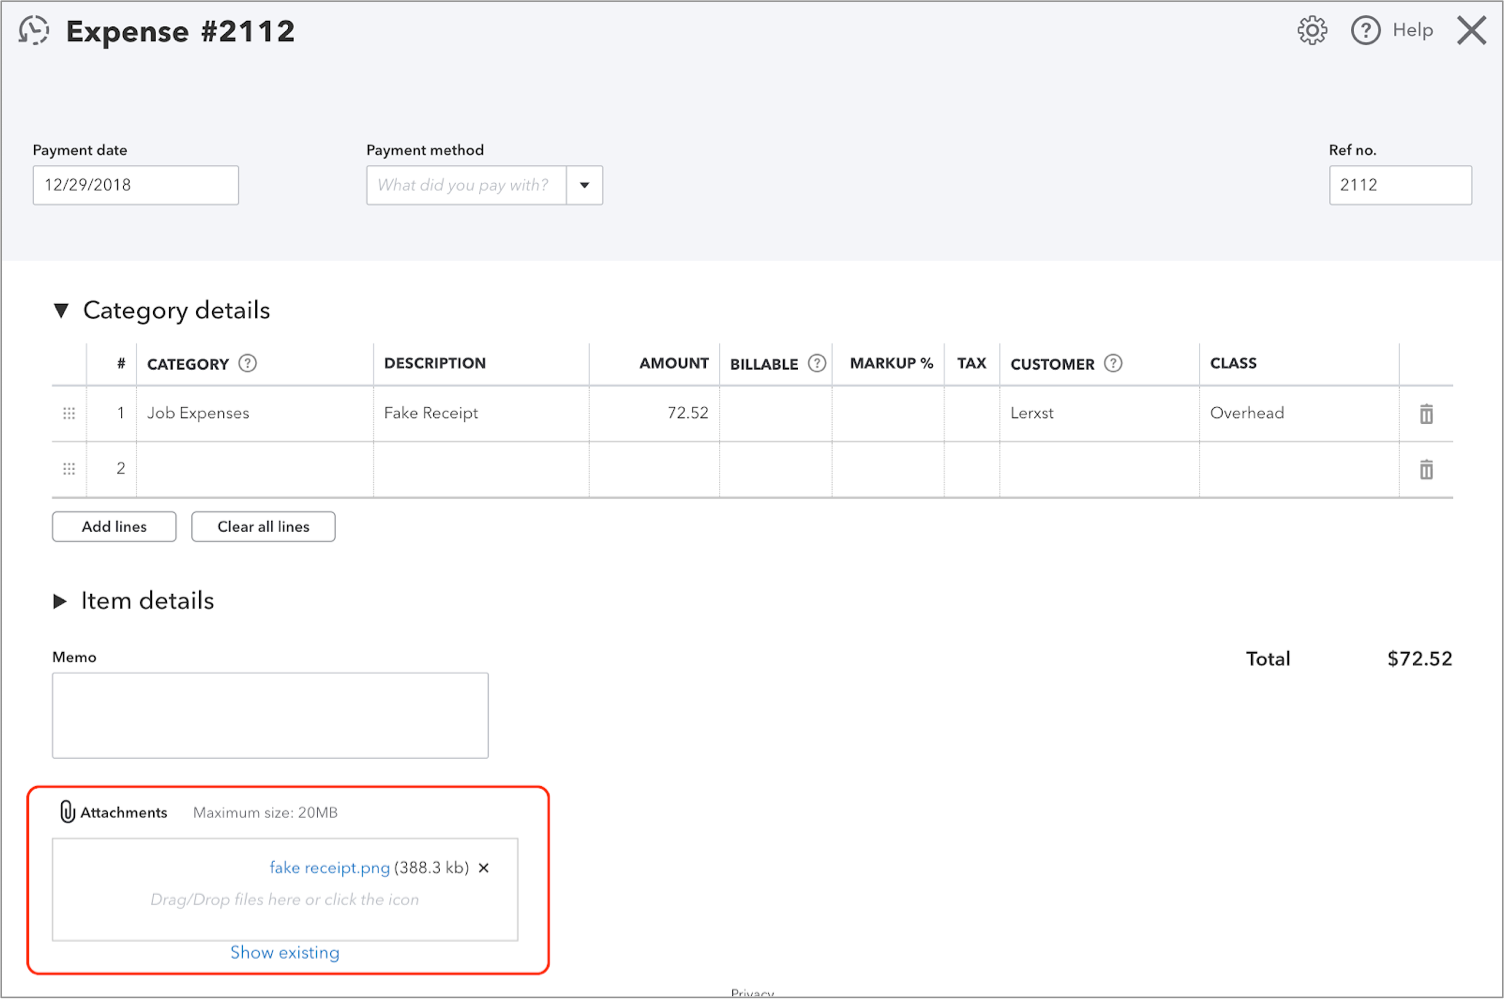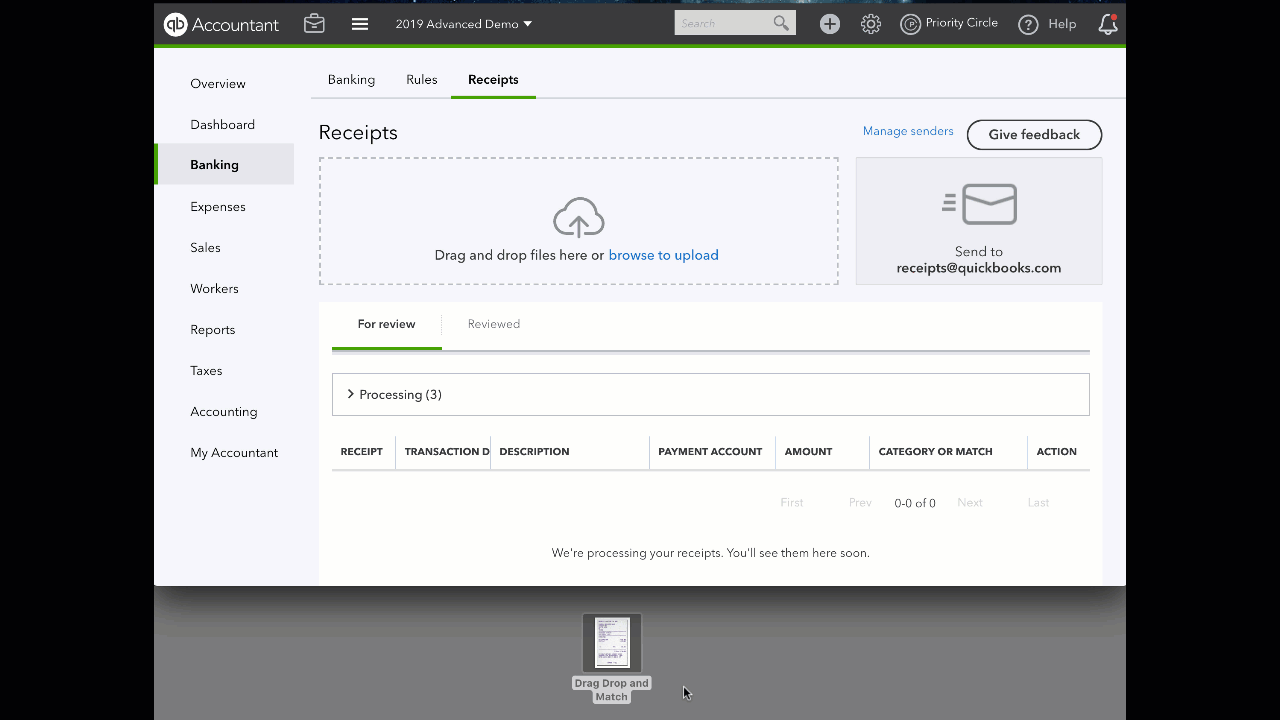
We know that there are few things more anxiety-inducing than a shoebox full of receipts. Many QuickBooks ProAdvisors® have told us, “I wish my small businesses could scan their receipts like they do in QuickBooks Self-Employed.”
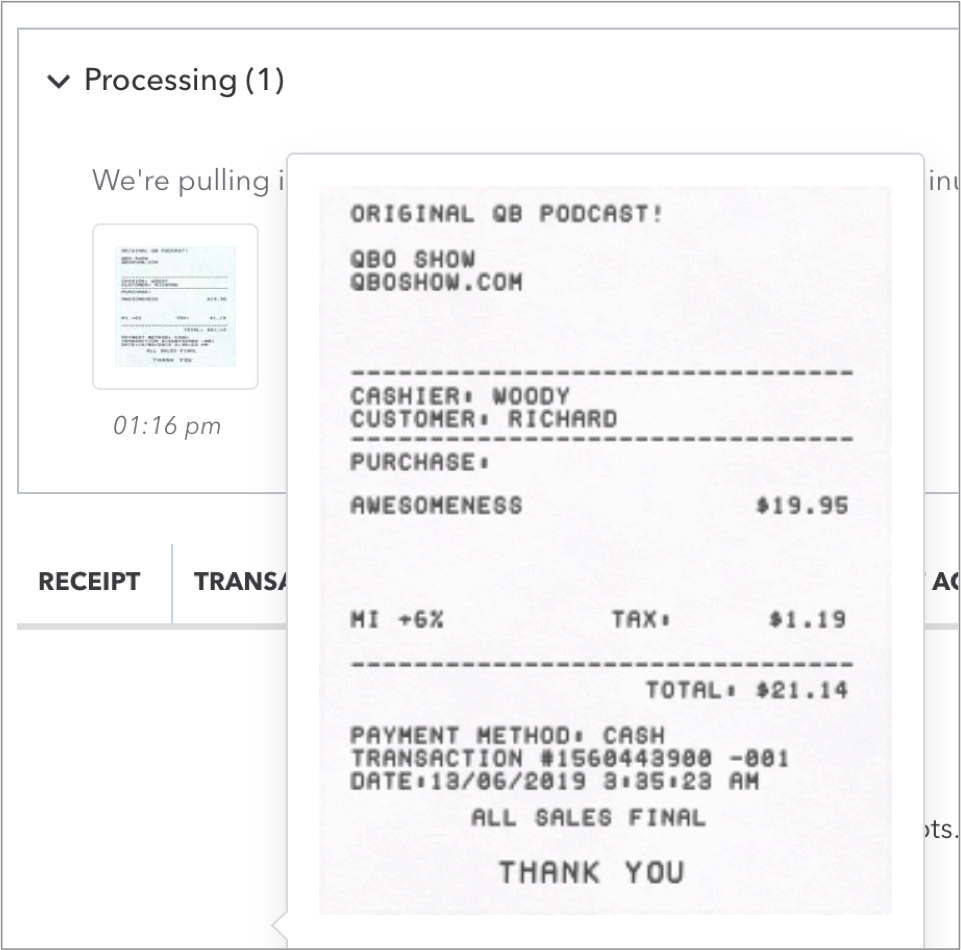
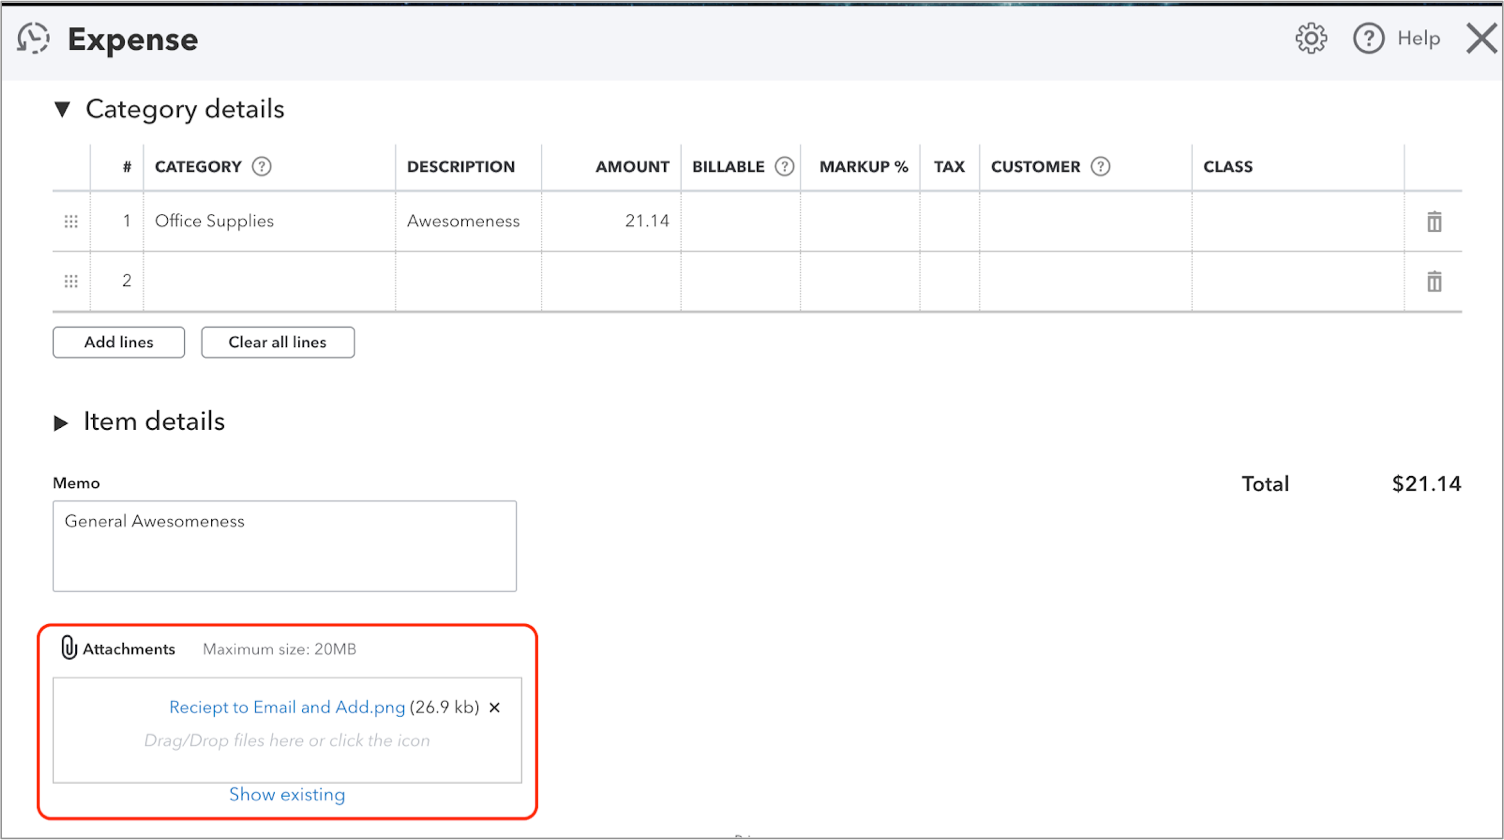
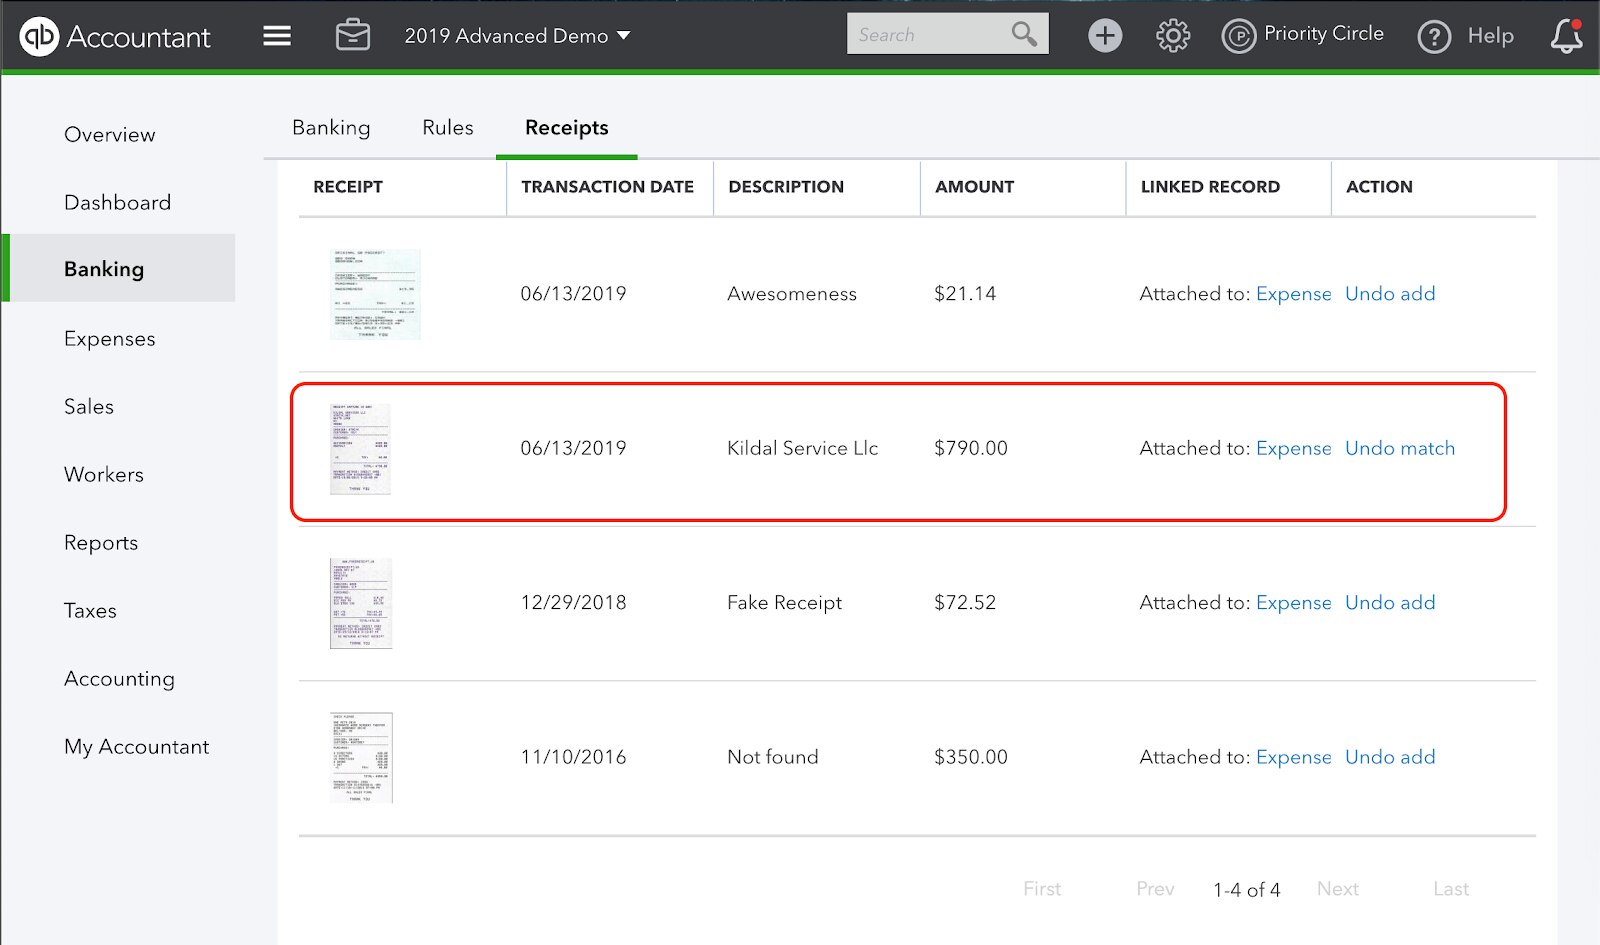
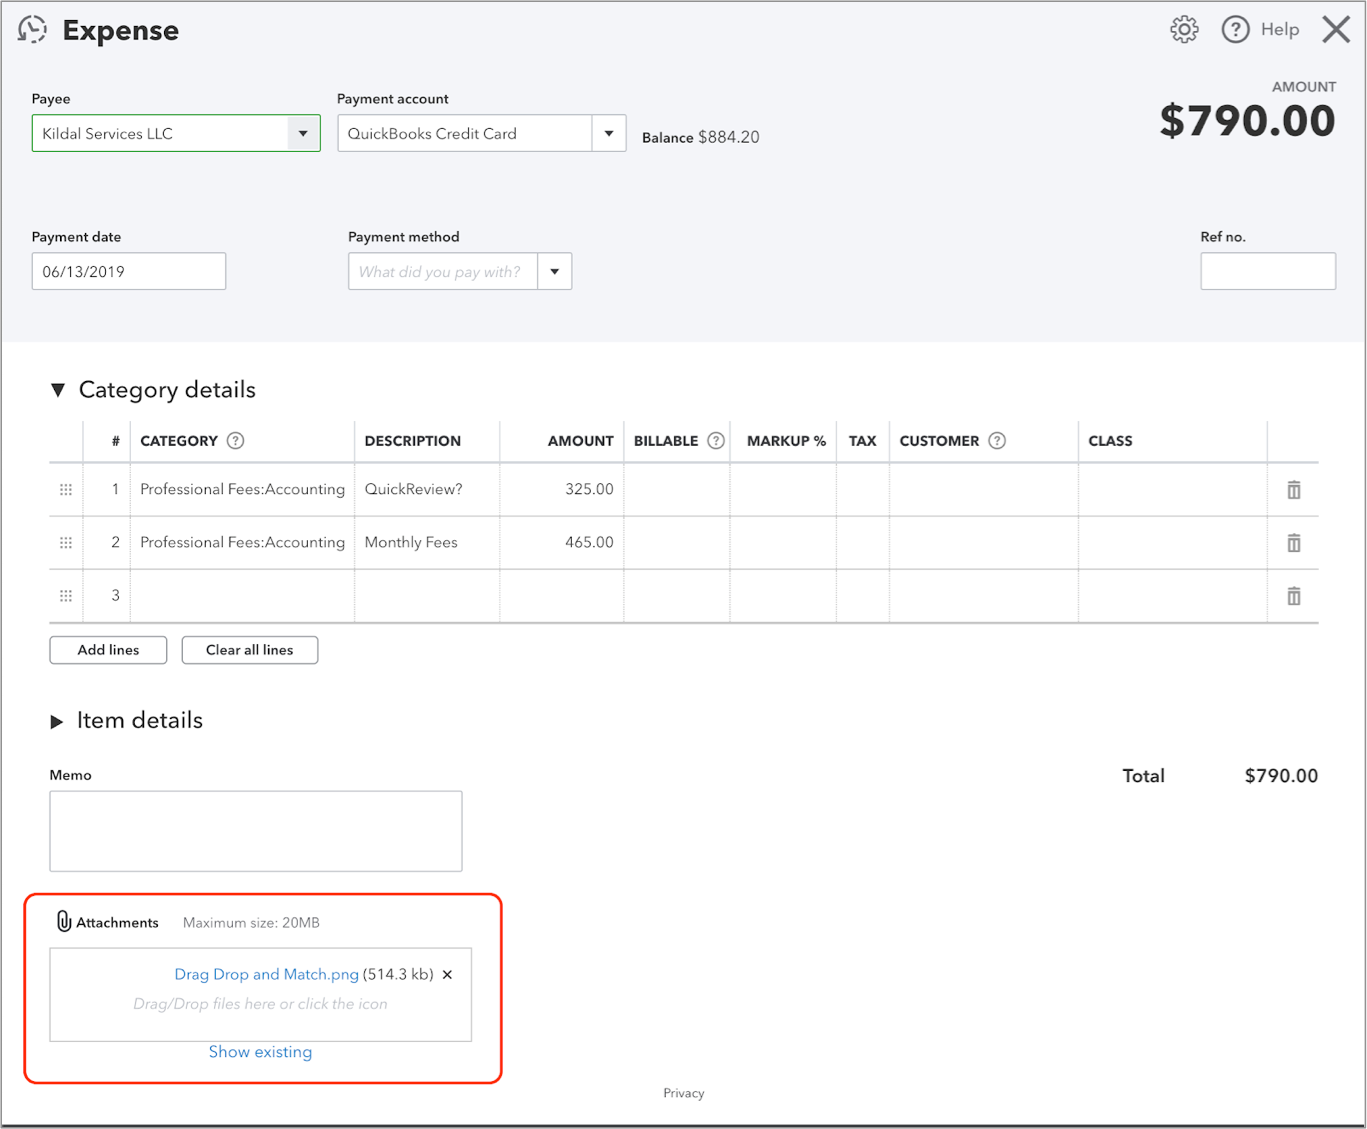
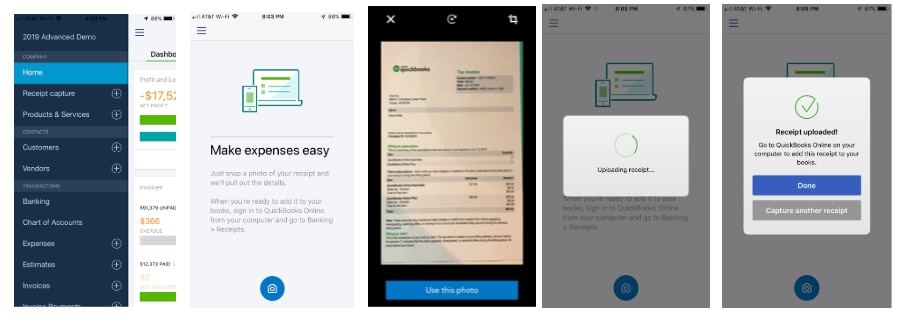
We heard you! Now, you and your clients can snap and store receipts digitally in QuickBooks® Online to save hours of labor throughout the year. Receipts are automatically categorized and matched to transactions, so everything’s organized and ready at tax time, with no shoebox in sight.
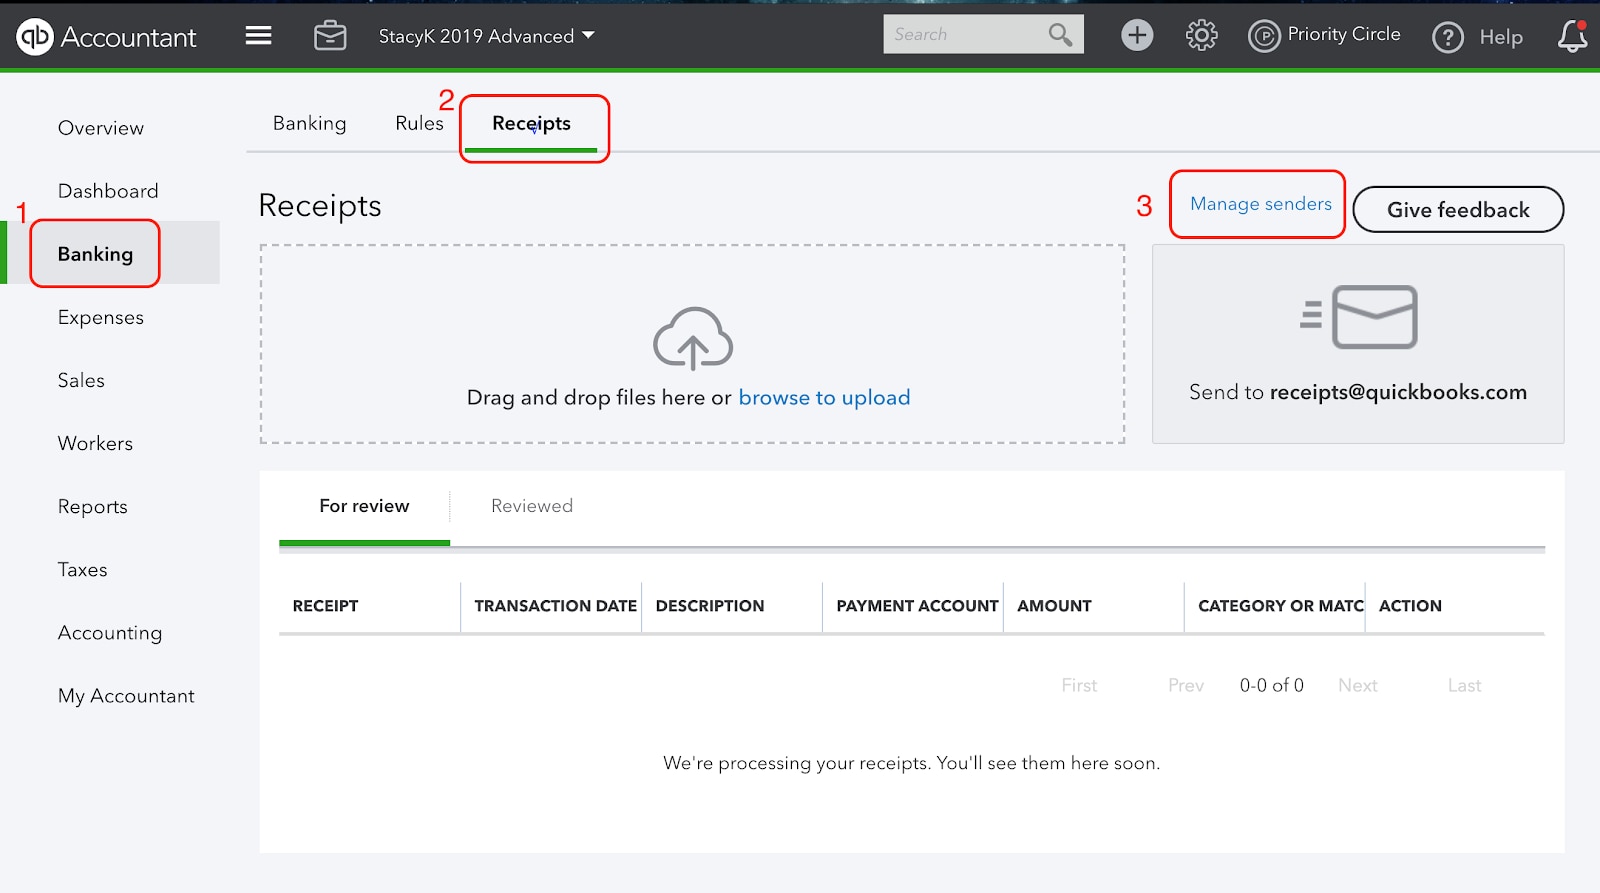
How do I use it? The ProAdvisor’s Guide