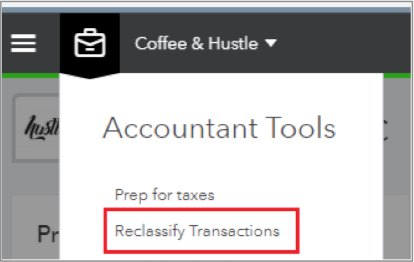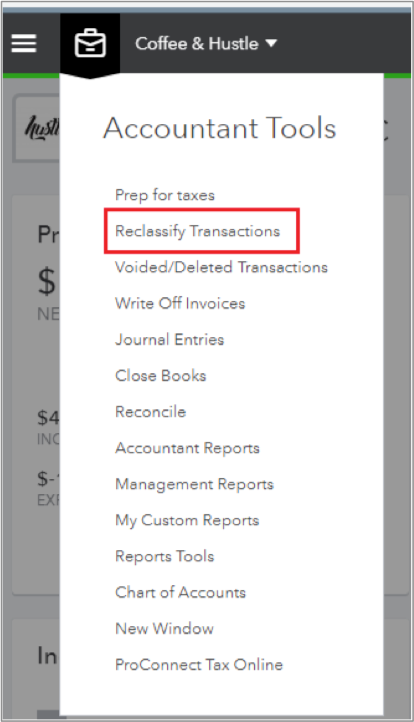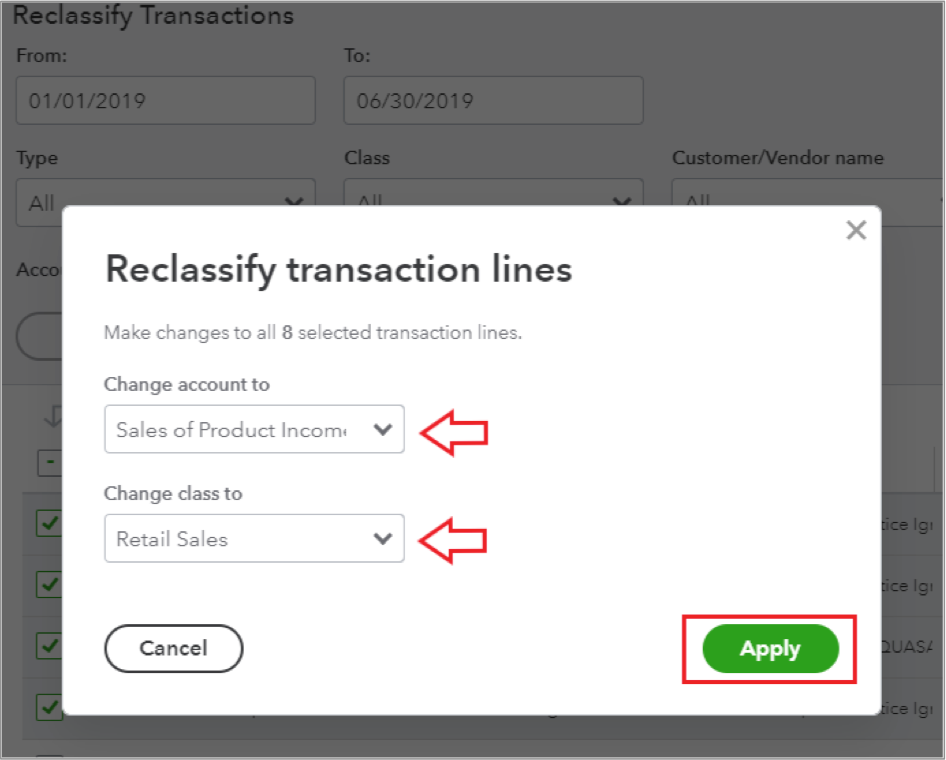
If you’re not using Reclassify Transactions, you’re missing out – and probably spending too much time fixing client mistakes. Find out why this newly redesigned Accountant Toolbox feature is a fan favorite and learn how to save hours per project (and your sanity).
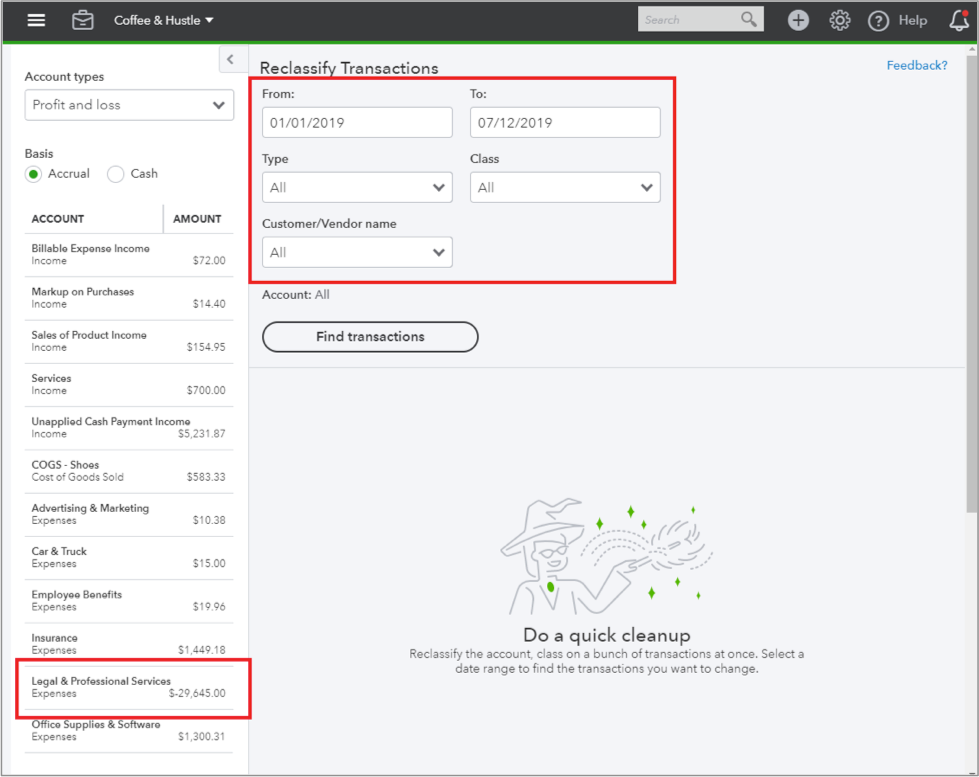
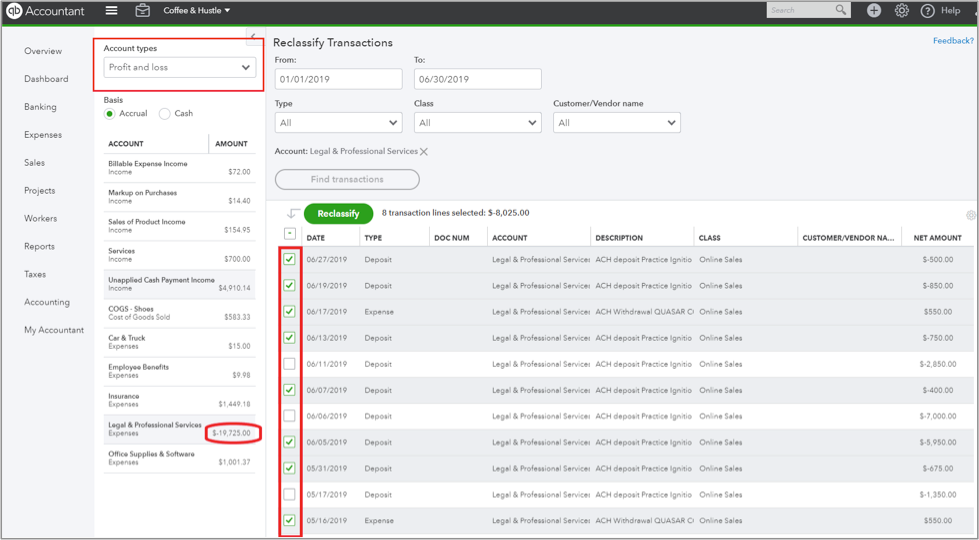
How do I use it? The ProAdvisor’s Guide