Your Feedback in Action
accounting

QuickBooks Online Advanced for real estate brokers: Custom Fields

QuickBooks® Online Advanced has many robust features that you can use, from creating more streamlined processes to getting better data out of your accounting and bookkeeping system. Everyone from the small business owner to the CEO of a large corporation needs one very important thing … data.

Data

What data are you not getting that you would like to get out of your accounting system?

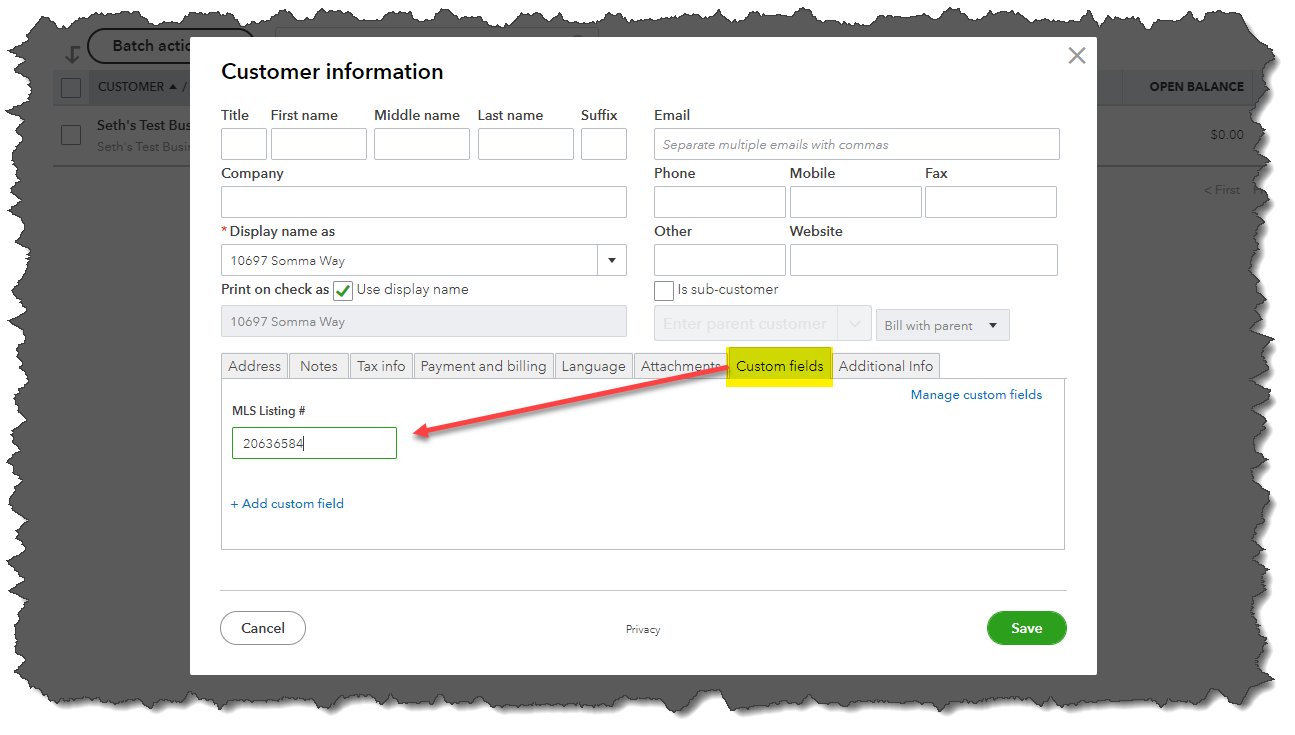
Real estate brokers have a lot of information to track. With QuickBooks Online Advanced Custom Fields, you can track a lot more right in your accounting system.

Let’s look at some examples of things real estate brokers may want to track. This is non-accounting data that fits logically right alongside the accounting data.

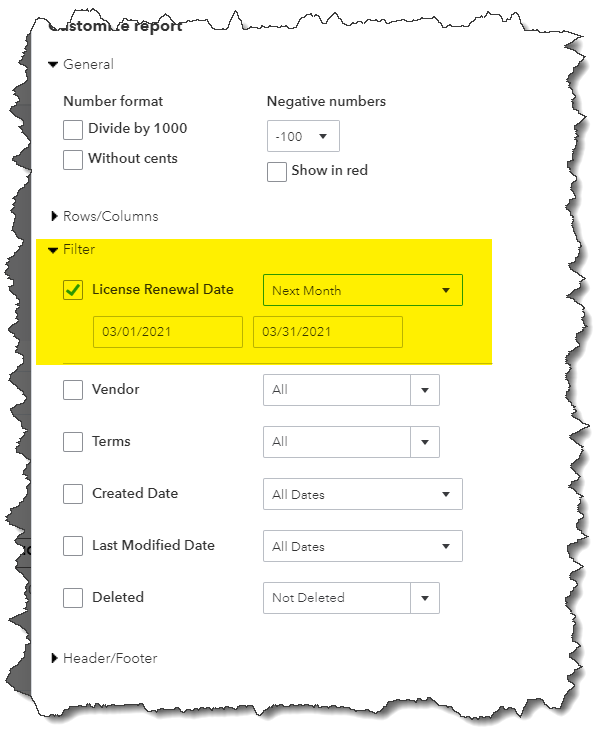
License renewal dates

Most accounting systems have transaction dates and due dates, but many businesses have other dates they need to track, and it makes sense to track them in your accounting system.

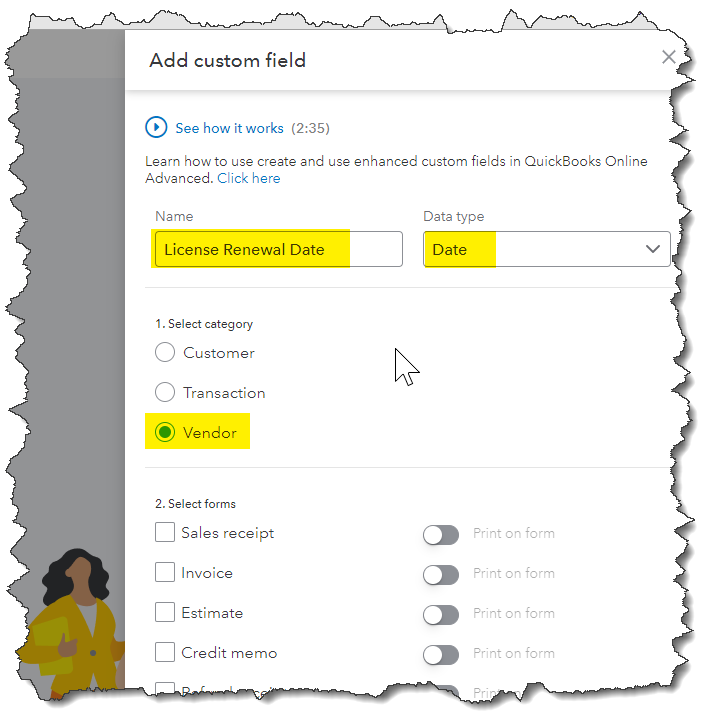
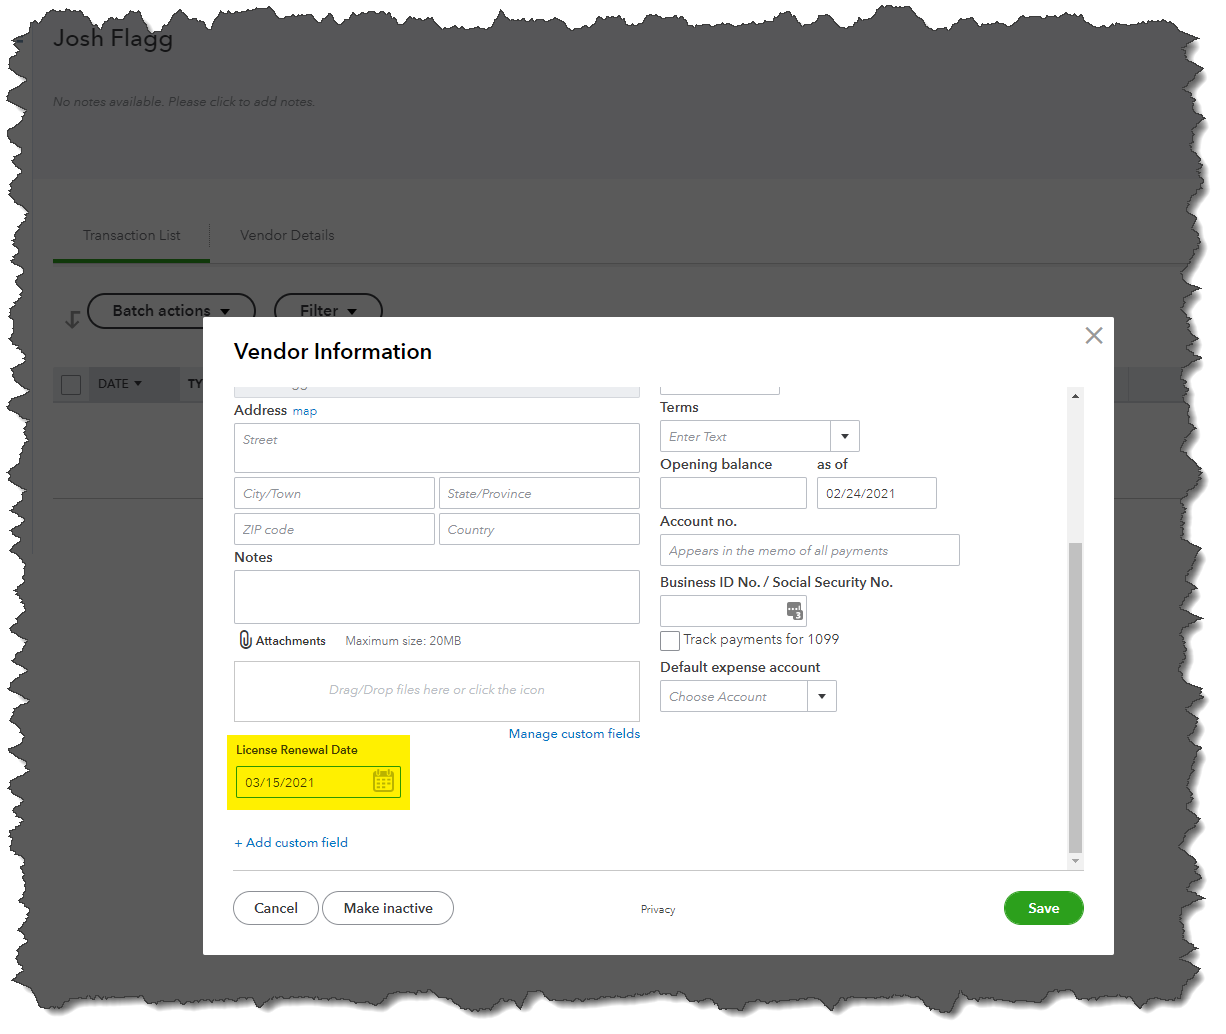
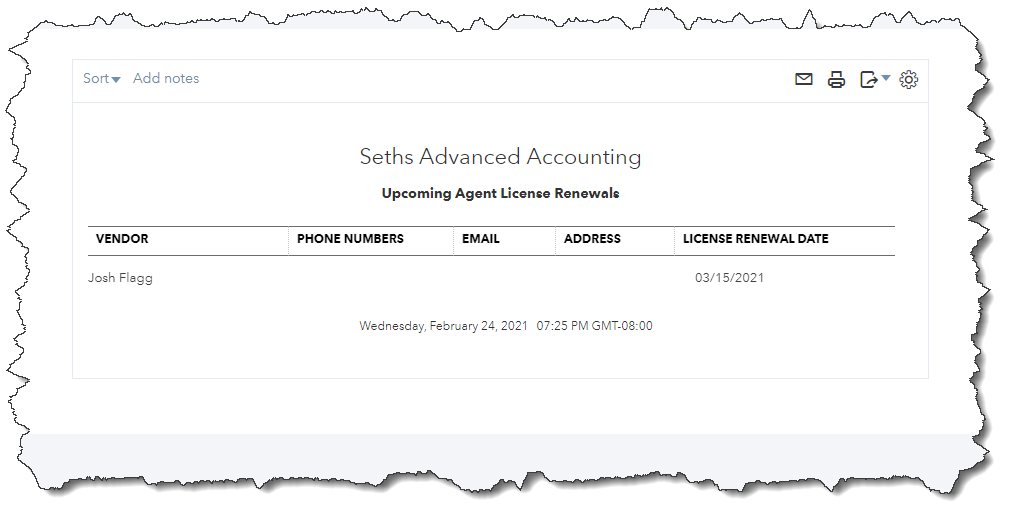
Here’s one example that recently came up with a client of mine. The client is a real estate broker, and they have many agents that they work with. They wanted to track their agents’ license renewal dates, so that they could remind agents to handle the renewals before they expire.

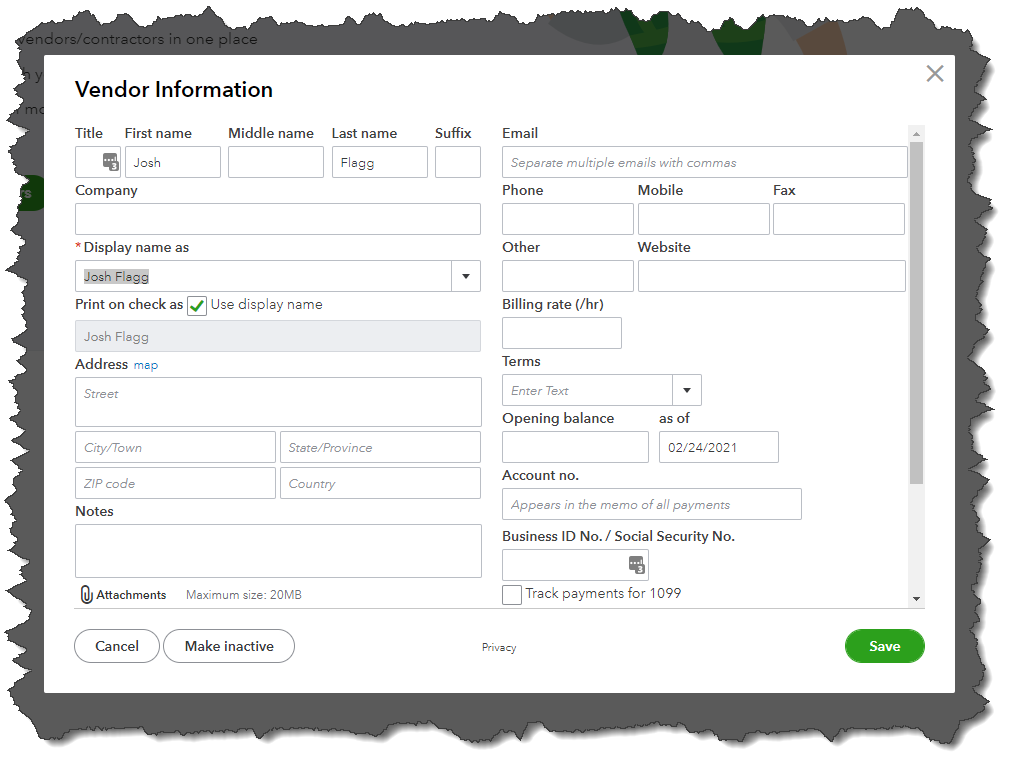
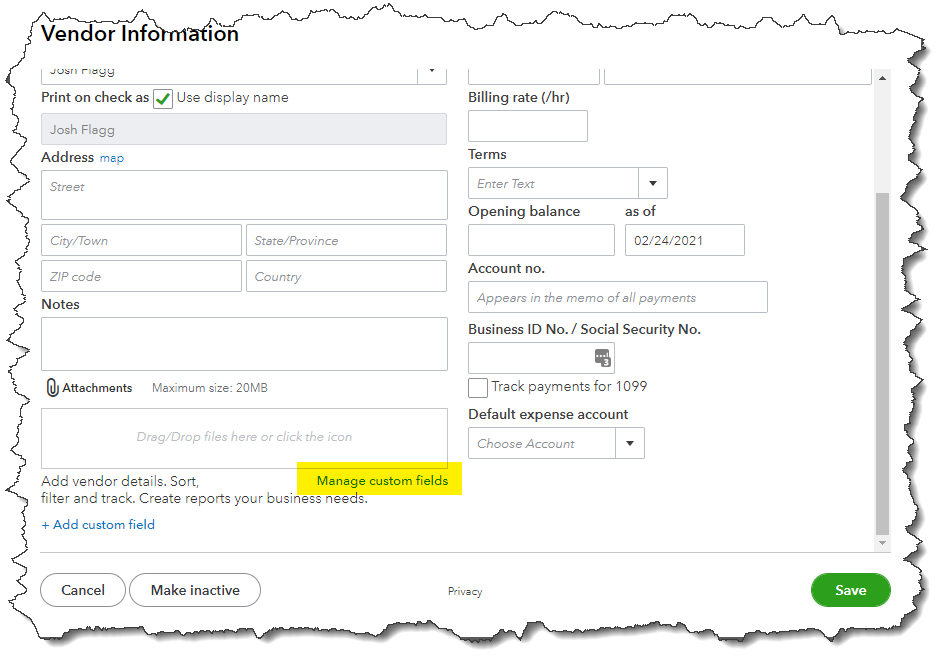
This is easy to do with a date-based field in QuickBooks Online Advanced. Since agents are usually contractors who get a 1099, they need to be set up as vendors, so that is the perfect place to associate the custom date-based field.

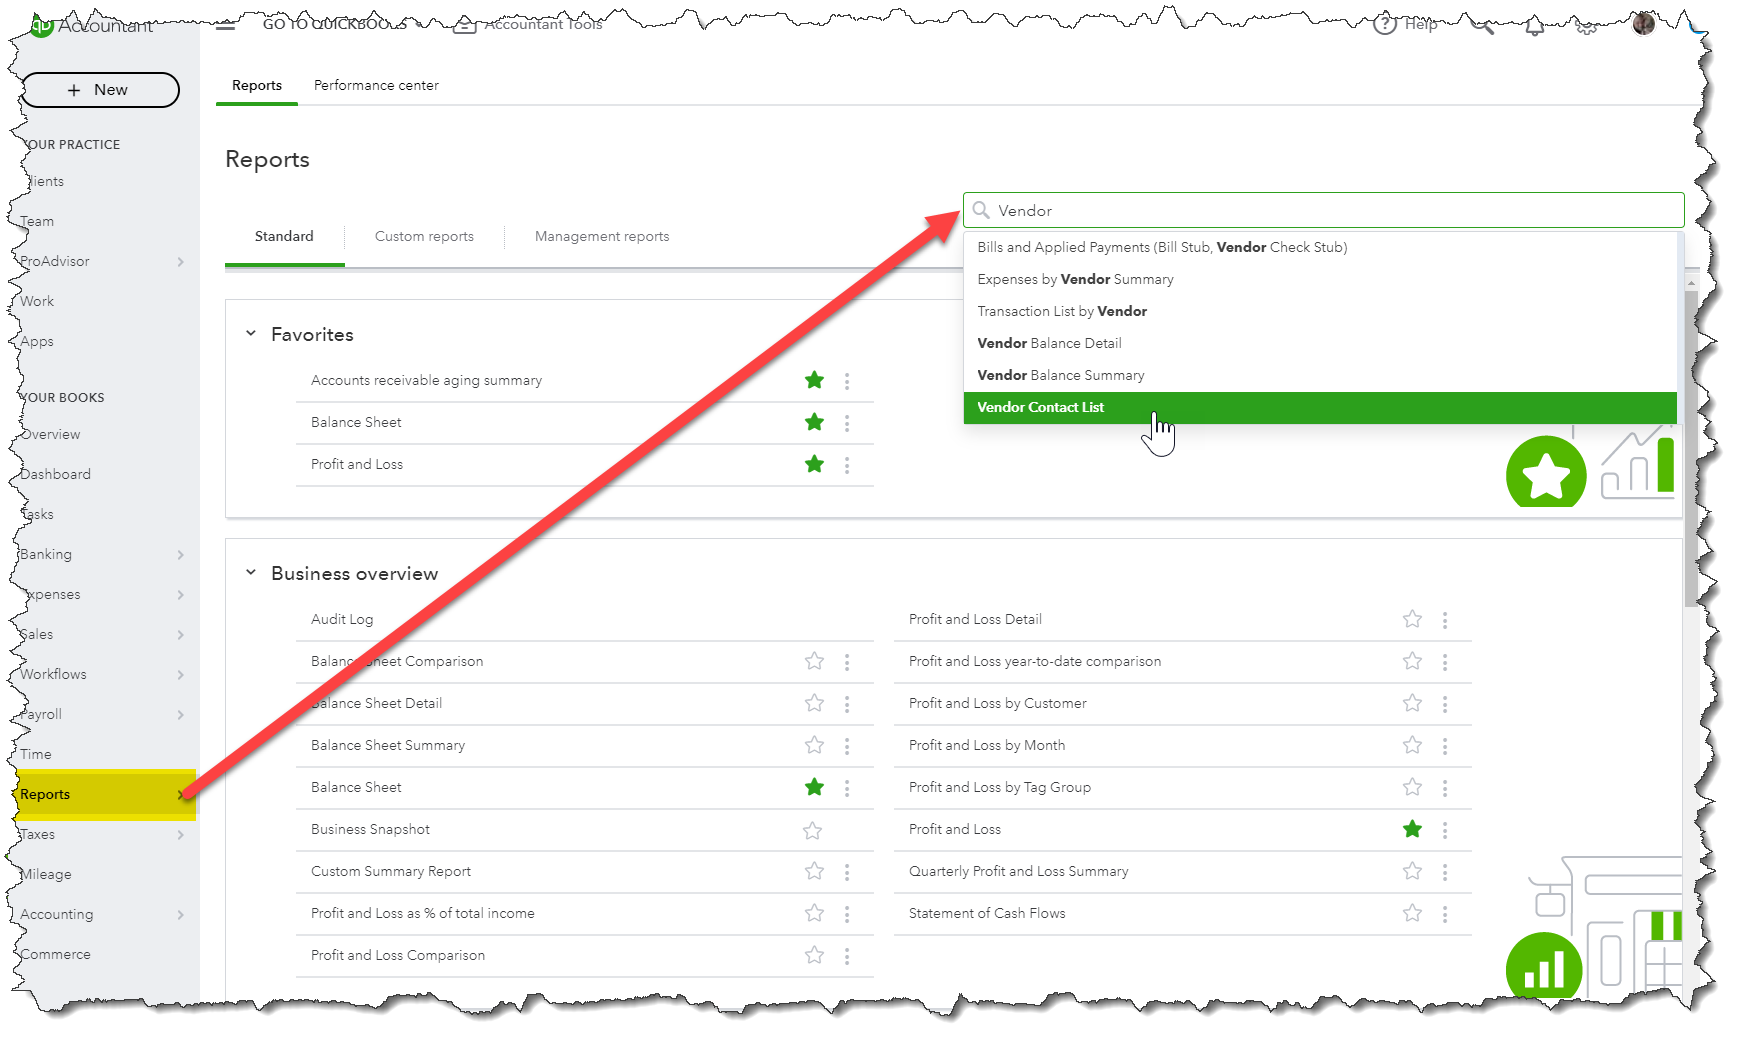
And, you can set this up when you are setting up the vendor. Click on Expenses (left margin) and then add a new vendor.

Now, scroll down:

Set up the custom field, as follows:

You don’t need to use this field on any forms. We’re going to use this on a report that we can run, based on upcoming renewal dates.

Once you save that custom field, navigate back to the vendor, edit the vendor, and set the renewal date. In my example, I’ve set Josh Flagg up as my agent, and let’s say his renewal date is 3/15/21.

Now, let’s run a report to see whose licenses need to be renewed in the next month! Since this data is associated with a Vendor, we’ll start with a Vendor Contact List Report.

Navigate to Reports on the left in QuickBooks Online, and enter “Vendor” in the search field to see this report come up. Select it, and then click Customize at the top right of your screen.

After you click Customize, click where it says “Change Columns.”

Now, it becomes clear how to customize the report. Add in your License Renewal Date and add and remove any other columns, based on what you want to see here.

Once you have your columns set, click Run Report way down at the bottom right.

Initially, this report will show all agents and all license renewal dates. The nice thing about this is that we can apply filters to show specific date ranges.

Go back to customize the report. Then, click Filters, and check License Renewal Date.

As you’re setting this up, take some time to review your options in that drop down. There’s another option for “Next 4 Weeks,” which probably makes a lot more sense. You’ll also want to create a variation on this to show any with dates in the past. Obviously, when the agent renews their license, you should update their renewal date to the following year.

Pro Tip: You can click on their name in this report and it will take you right over to their vendor profile, where you can make that edit very quickly.

MLS listing #

If you’re taking my suggestions on how to do the accounting for a real estate broker, then your listings will each appear in the Customer list. Why not include the MLS listing # right there so you have it at close reach, while you’re working on your accounting? Then, you can include this in reports, such as all listings.

The process of creating the custom field is the same as the License renewal date, except this time we’re going to set up a “Number only” field type and the field will be associated with a Customer instead of a vendor.

Now, let’s add a listing with all of the information (including a photo). In the video, I’ll go into much more detail on this.

Listing agent (drop down)

There have been many ways to track sales by agent over the years, but with QuickBooks Online Advanced, this is easily accomplished with a drop-down field. Note: You still need to set up your agents as vendors for when you pay them, and so that you can 1099 them.

This time, we’ll create a drop-down field type associated with a Customer. For the situation where you have two agents on the same listing, I would create that combination of agents as another choice.

This data will be useful in many ways, and while it may be non-accounting data, it has such a close relationship with your accounting data that it makes sense to track all of this data in your accounting system.

In the video below, I am going to show you how to set all of this up, and then we’ll run some reports so you can see this data in action.


Get the latest to your inbox

Get the latest product updates and certification news to help you grow your practice.

By clicking “Submit,” you agree to permit Intuit to contact you regarding QuickBooks and have read and acknowledge our Privacy Statement.

Thanks for subscribing.

Relevant resources to help start, run, and grow your business.

Looking for something else?

Get QuickBooks

Smart features made for your business. We've got you covered.

Tax Pro Center

Expert advice and resources for today’s accounting professionals.

QuickBooks Support

Get help with QuickBooks. Find articles, video tutorials, and more.

How can we help?
Talk to sales 1-800-497-1712

Monday - Friday, 5 AM to 6 PM PT

Get product support