Accountant setting up their invoices on QuickBooks.
accounting

Help project-based clients work smarter with these two QuickBooks Online enhancements

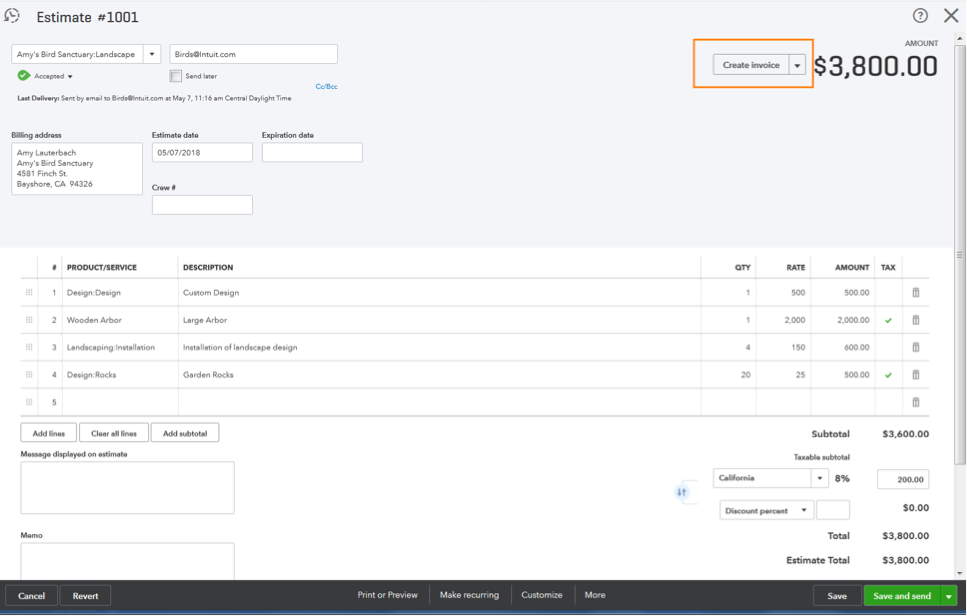
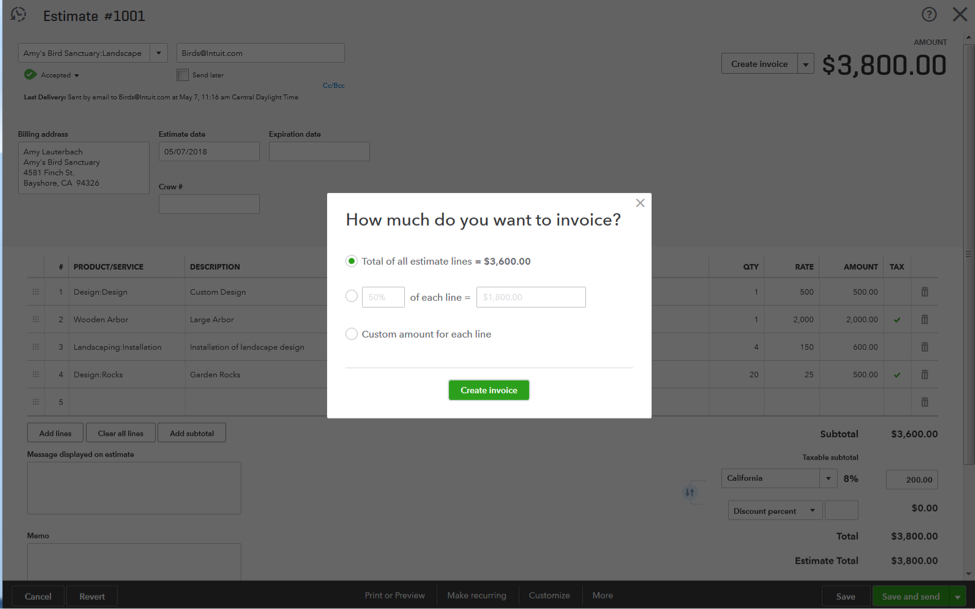
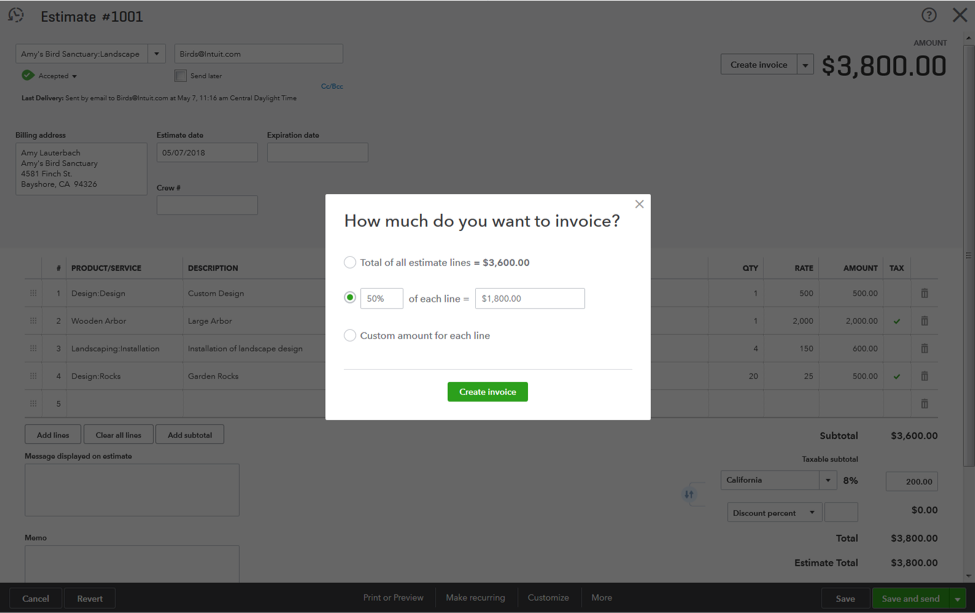
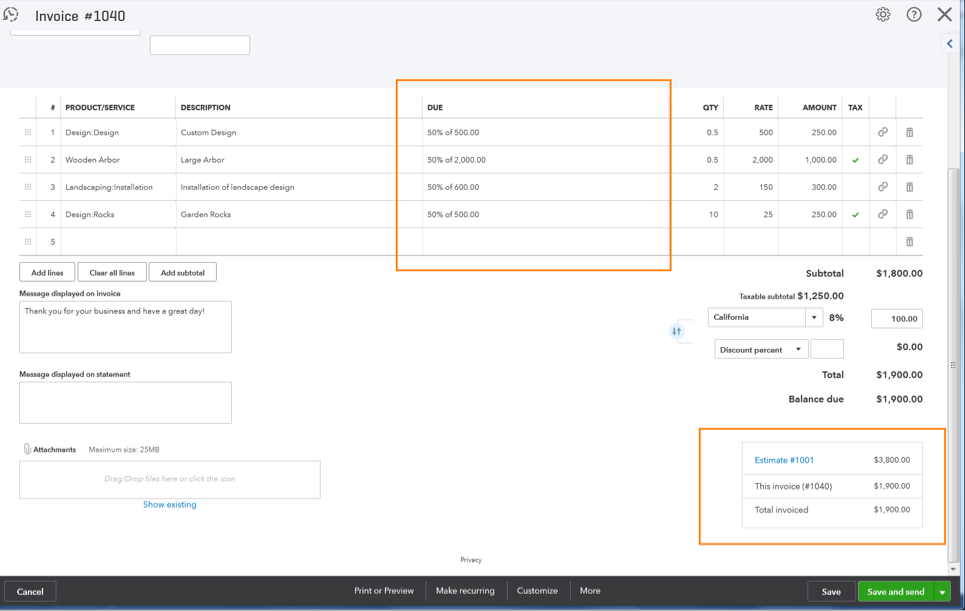
Getting paid and staying organized are particularly challenging for project-based businesses, such as designers and contractors, who often have long gaps between paydays and little consistency between assignments.


Scratch that. It used to be challenging. We’re thrilled to announce two of our latest updates to QuickBooks® Online — our Projects tab and Progress Invoicing option — designed specifically to help your project-based clients easily stay on track and regulate cash flow.

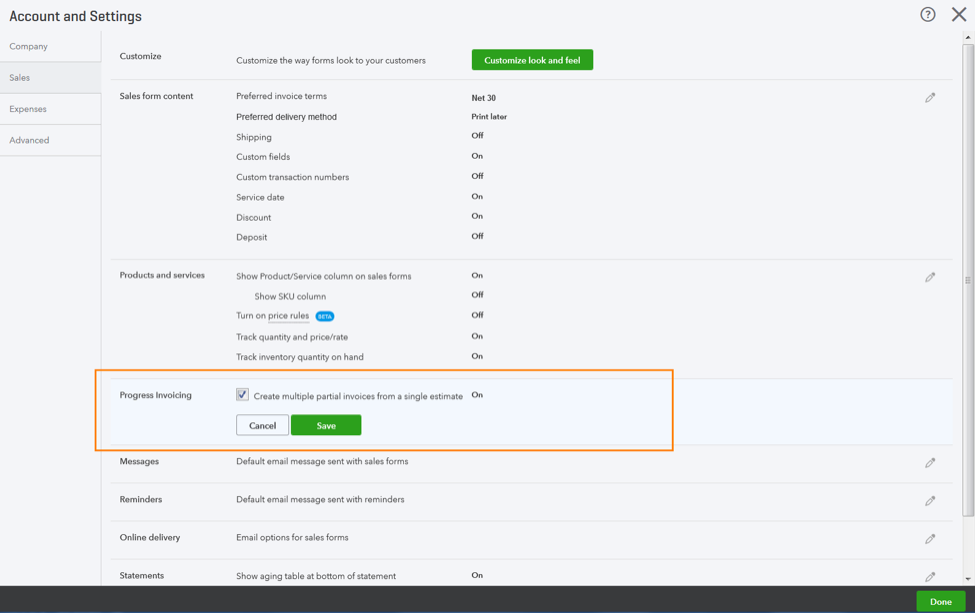
Please note that Progress Invoicing can be used in QuickBooks Online Simple Start, Essentials or Plus. It can be used alone or with Projects, which is only available in QuickBooks Online Plus.

Here’s what you need to know about using these features.

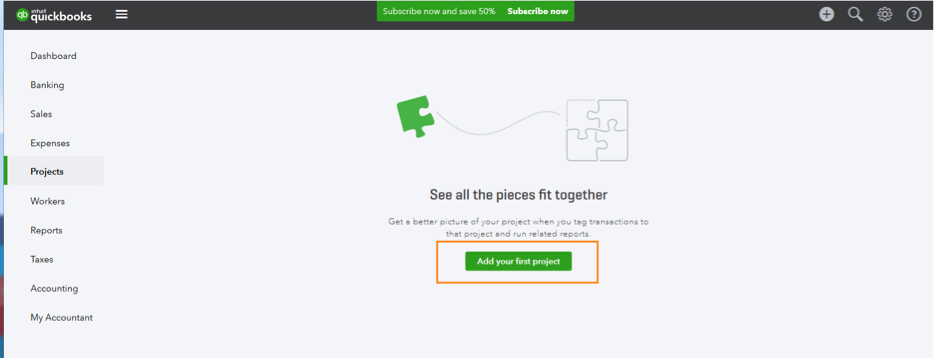
Make organization simple with the Projects tab

No two days or two assignments are the same for project-based businesses — but that doesn’t mean managing these projects should be as unpredictable.

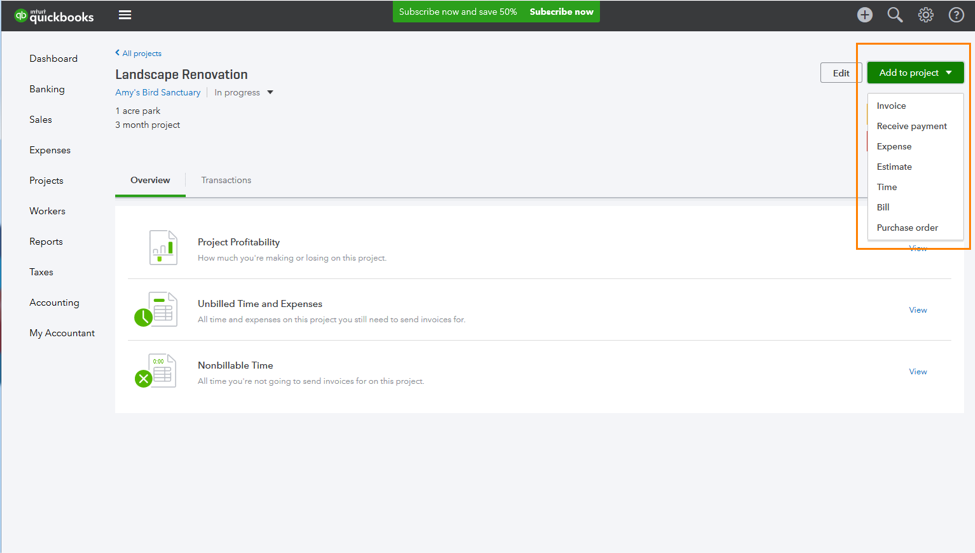
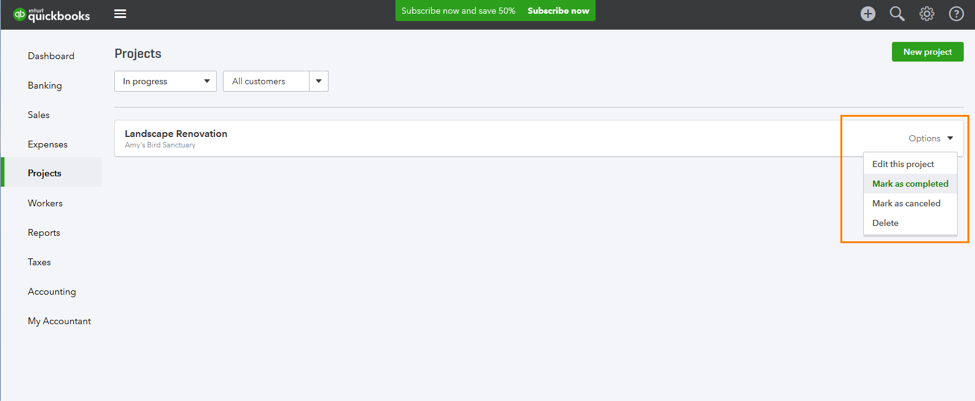
With our Projects tab, your clients now have one central hub where they can create projects and manage and track all of the transactions and activities that go along with them. That way, even though the work is constantly changing, the way to organize it stays the same.

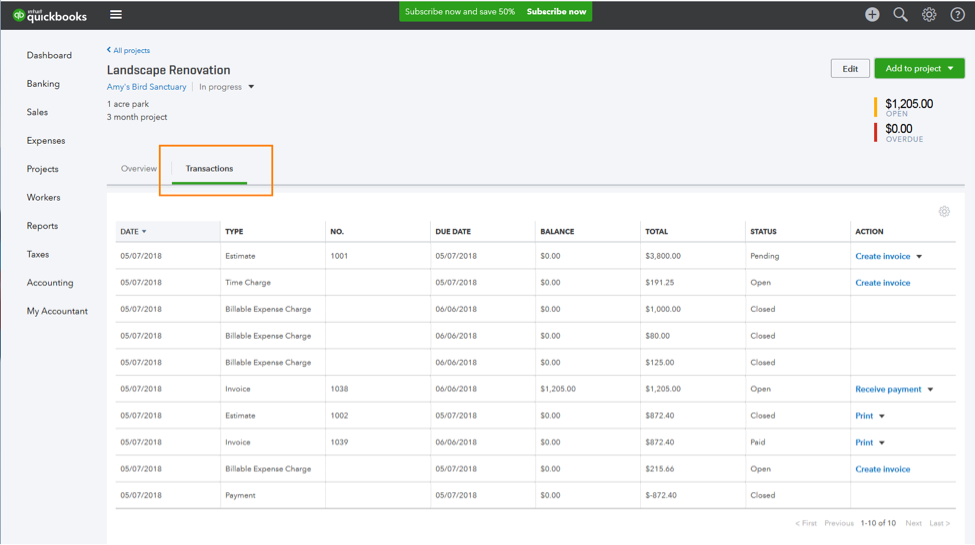
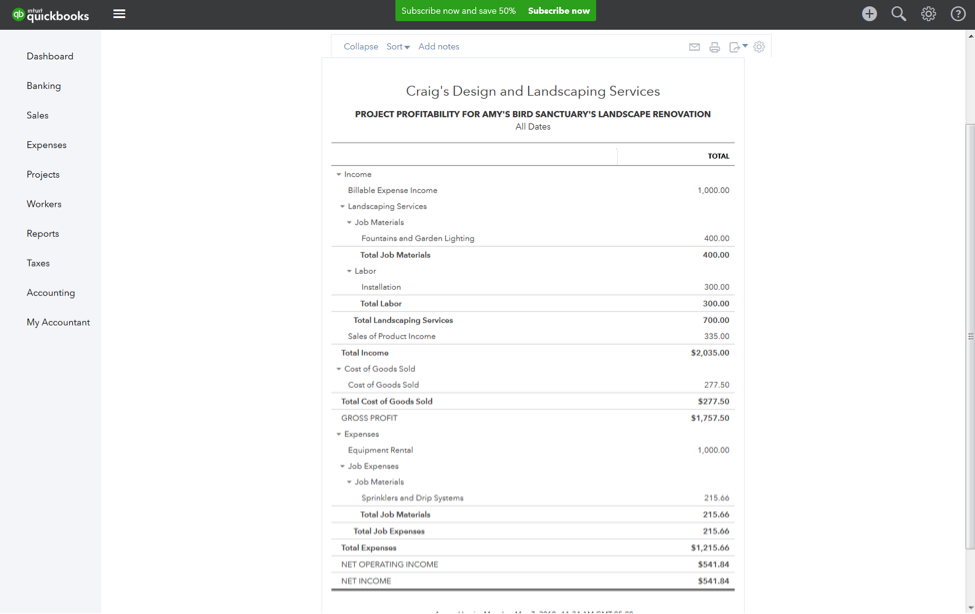
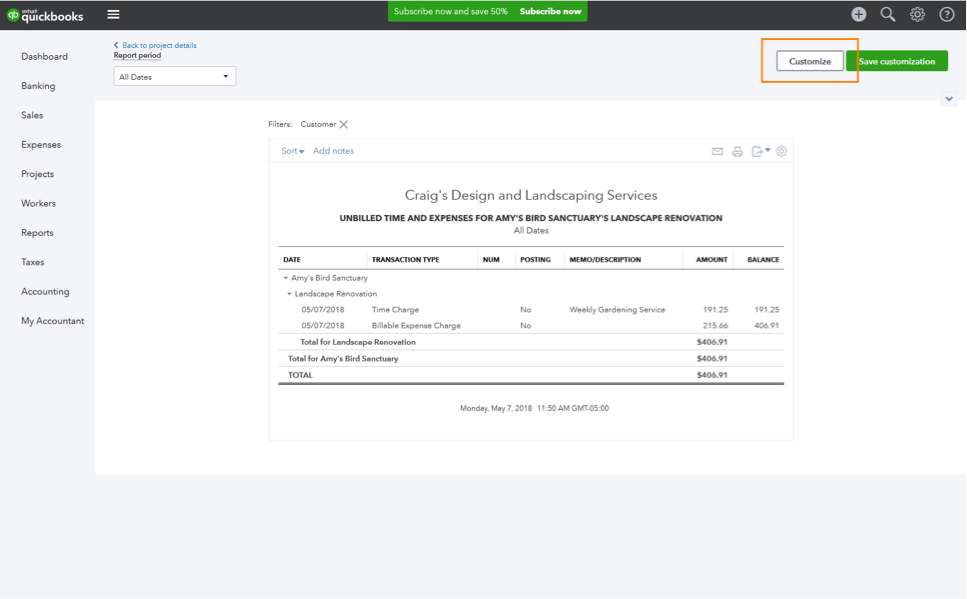
The Projects tab also lets your clients gain more clarity into the work they’ve done. For example, we’ve made it easy to run a profitability report with one click right in QuickBooks; clients no longer have to waste time manually customizing reports to understand how much they earned or lost on their last project.

At a glance: In Projects your clients can… 

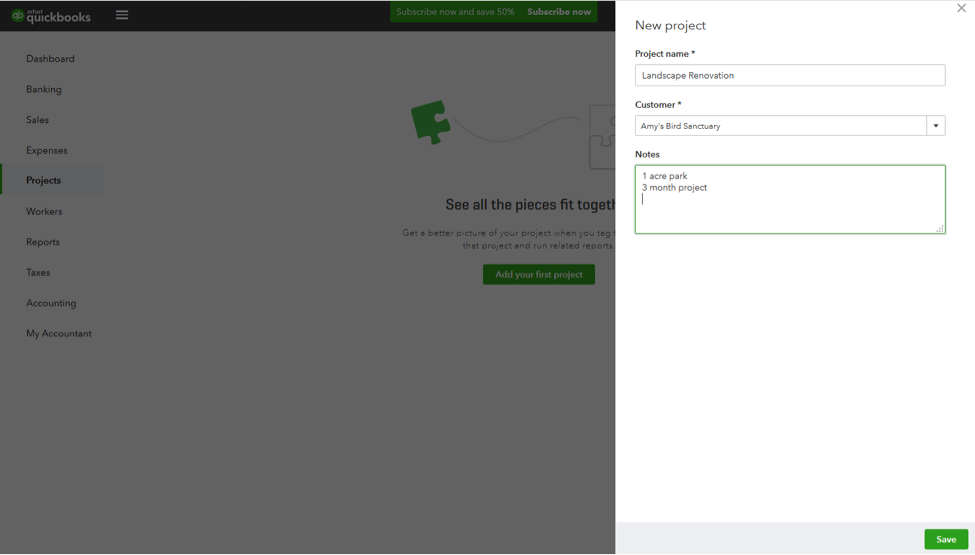
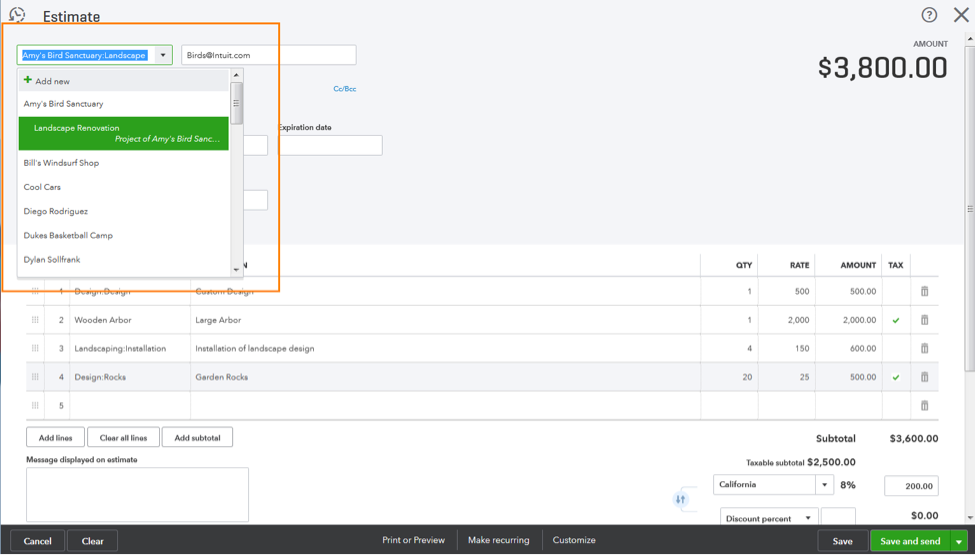
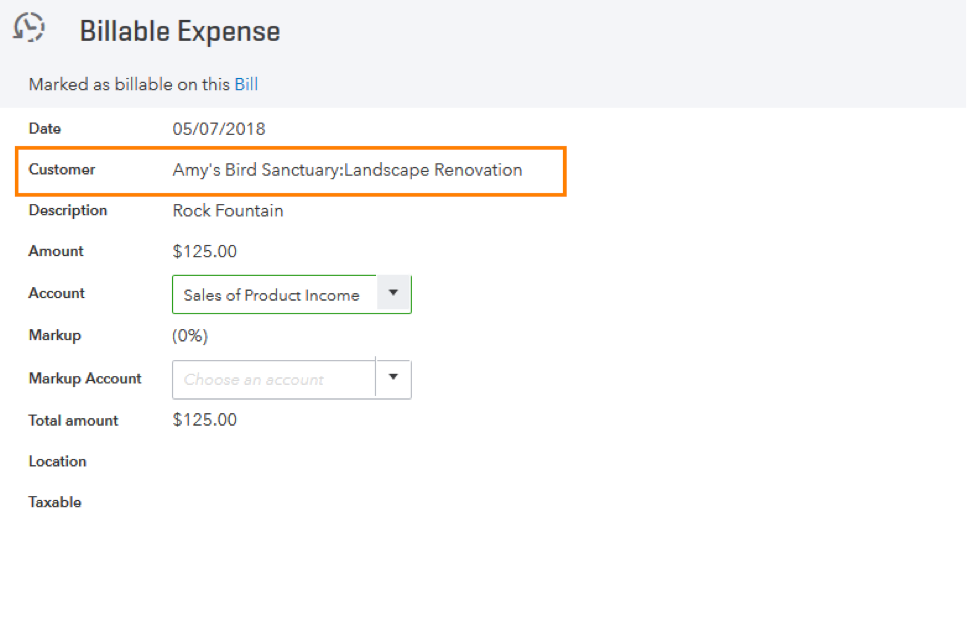
  • Create projects by customer.
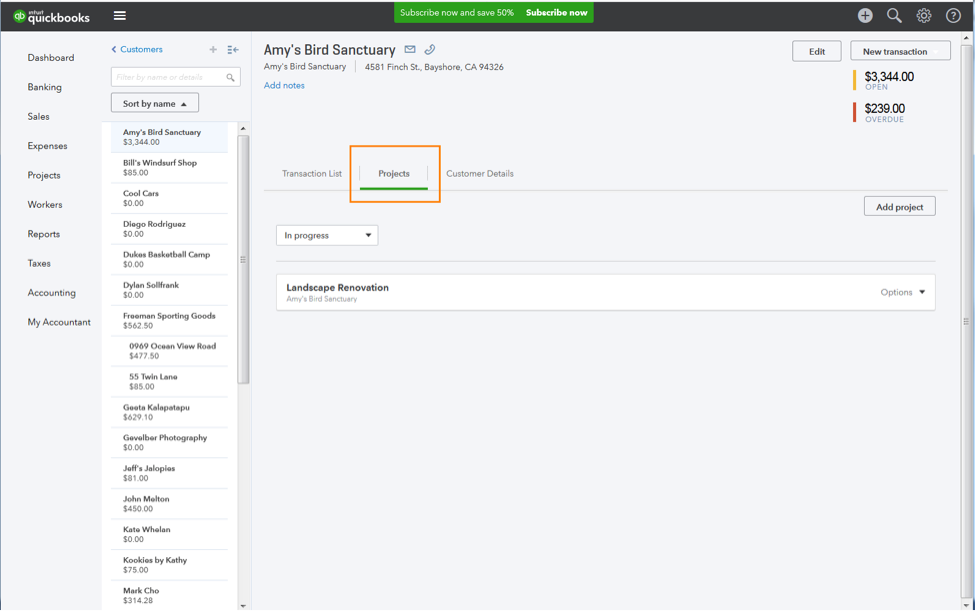
  • Tag invoices, expenses, timesheets, bills, payments, and other transactions to the customer and their project.
  • Run a profitability report with one click.
  • See outstanding billable expenses and time.
  • View non-billable time.
  • Take notes and mark a project completed when finished.

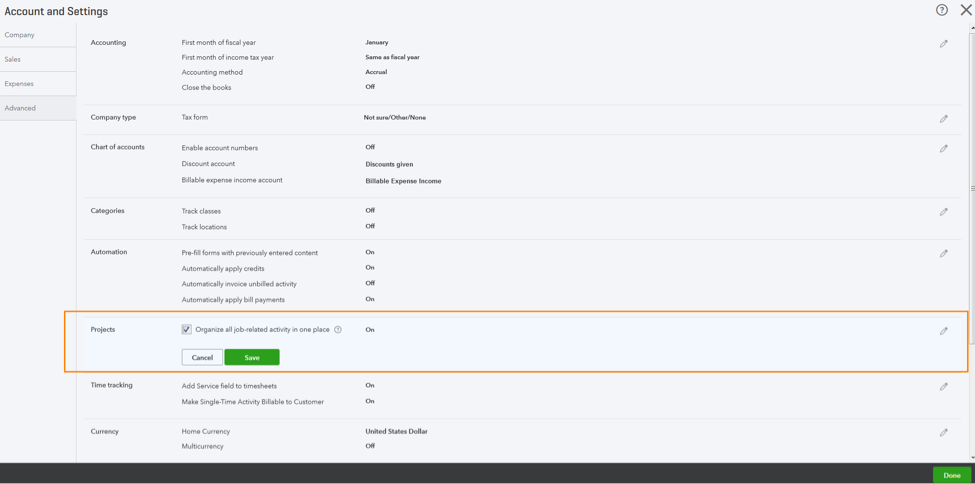
How to turn on Projects in your client’s QuickBooks Online 

1. Under the Gear icon, select Account and Settings.

2. Select the Advanced tab on the left panel.

3. Turn on Projects.

Image Alt Text

This will add a Projects tab on the left navigation panel. When opened, you’ll be prompted to add the first project.

Image Alt Text

4. Name the project, indicate the customer, fill in notes (optional), and click Save.

Image Alt Text

Once you create projects, you can quickly access them from the Projects tab in the left navigation panel, or the tab of the same name within a customer’s profile.

Image Alt Text

How to manage Projects and the Projects tab

1. Begin creating transactions and logging time for the project. You can do this quickly from the Add to Project menu in the upper right.

Image Alt Text

2. If you create a transaction from elsewhere in QuickBooks later (such as the Create (+)menu), you’ll be able to select the project the same way you would normally choose a customer. Projects show as sub-items below the customer name, as seen below.

Image Alt Text

Project names will show in customer/project fields on transactions, activities, and reports as “Customer Name: Project.” Here’s a Billable Expense, for example:

Image Alt Text

3. When you’re working in a project, toggle to the Transactions tab to see a list of the associated transactions and billable time/expenses.

Image Alt Text

4. Toggle to the Overview tab to quickly run reports, such as “Project Profitability,” which is a profit and loss report pre-filtered for each specific project.

Image Alt Text
Image Alt Text

You can run other reports, too — such as those on billable time and expenses, and non-billable time.

5. Select Customize in the upper right to make changes to reports, such as adding a column for “Employee,” for example.

Image Alt Text

6. Once a project is complete, you can update the status in the Options drop-down on the right.

Image Alt Text

Get clients paid faster with Progress Invoicing

Waiting until the end of a long project to get paid puts a lot of stress on your clients’ bank accounts — not to mention their minds. Thankfully, QuickBooks Online now allows your clients to use Progress Invoicing and bill their customers incrementally to keep cash coming in during ongoing projects.

Invoicing options

Once your clients establish an overall estimate for a project, they can select the invoicing method they want:

  • In Full: the total amount of the estimate.
  • Partial: pre-calculated percentage of the estimate.
  • Custom:amount you choose based around certain project milestones or other criteria.

How to use Progress Invoicing

1. Under the Gear icon, select Account and Settings.

2. Select Sales from the left navigation panel.

3. Turn on Progress Invoicing. Note: This feature may be turned on by default in some accounts.

Image Alt Text

4. To use Progress Invoicing, select Create invoice within the project’s existing estimate.

Image Alt Text

5. A box will appear asking which invoicing method you want — the full amount, partial percentage, or a custom amount.

Image Alt Text

6. Let’s say the client would like their customer to pay 50% of the estimate on the first invoice. Select the partial percentage option, fill in “50%” in the first box, and click Create invoice.

Image Alt Text

7. QuickBooks will automatically calculate the payment amount, and a “Due” column will show in the invoice. In the lower right, you’ll be able to see the progress made toward the total estimate.

Image Alt Text

You’ll be able to see the same progress section when you return to the estimate screen.

Image Alt Text

8. Let’s say the same client is creating their next invoice. They’ll be able to bill for the remaining balance, or again choose a percentage or custom amount. For example, a client might decide to do 50% on the first invoice, then 25% on the next, and so on.

Or they can choose to customize their own dollar amount by line, based around completing a major project milestone, for example. Whatever method they choose, make sure your clients set clear expectations with their customer.

Image Alt Text

9. As you create additional invoices, you’ll be able to see how much of the total estimate remains until eventually the remaining subtotal will show $0.00 and the estimate will be automatically marked closed.

Image Alt Text

Get the latest to your inbox

Get the latest product updates and certification news to help you grow your practice.

By clicking “Submit,” you agree to permit Intuit to contact you regarding QuickBooks and have read and acknowledge our Privacy Statement.

Thanks for subscribing.

Relevant resources to help start, run, and grow your business.

Looking for something else?

Get QuickBooks

Smart features made for your business. We've got you covered.

Tax Pro Center

Expert advice and resources for today’s accounting professionals.

QuickBooks Support

Get help with QuickBooks. Find articles, video tutorials, and more.

How can we help?
Talk to sales 1-800-497-1712

Monday - Friday, 5 AM to 6 PM PT

Get product support